
Lori Unruh and Jeff Poole join the blog again in Part II of this Shooting to Sell series. Lori and Jeff are award-winning photographers and owners of indigosilver studio, a portrait and wedding photography studio based in Wilmington, NC. Jeff and Lori also run The Shoot Space, an educational resource for photographers.
Learn to make more from your portrait sessions (and have happier clients) by shooting with the sale in mind. In Part I, we discussed our pre-session consultation approach to get our clients thinking about products, and how we structure our shoot in order to shoot for those products.
Our sales process follows a very specific flow to help ensure consistent sales.
Today, we’ll continue the shoot-to-sell process by delving into our sales process. We help our clients choose images for the products they’ve requested, and we share the tools we use to design the products.
The Sale
Our sales process follows a very specific flow to help ensure consistent sales. First, we greet the clients, make small talk, offer them refreshments, etc. Then we explain the sales process to them. We tell them that they’ll see a slideshow of all the images, then we’ll revisit which products they’re interested in purchasing, and then we’ll help them choose the images that fit those products. It’s a reminder that the goal of photography is to take home products. There’s no sticker shock, because they’ve already seen our prices at the pre-session consultation, and they’ve prepared themselves to buy. Because I am a goal-oriented thinker, I usually guide the sales process while Jeff gets other work done.
There are a lot of great sales programs out there, but I like the flexibility Lightroom allows. I can do the slideshow, see all the images in grid mode, compare a few images at a time in Survey mode, zoom in on individual images in Loupe mode, and even change the crop and/or color treatment right on the spot.
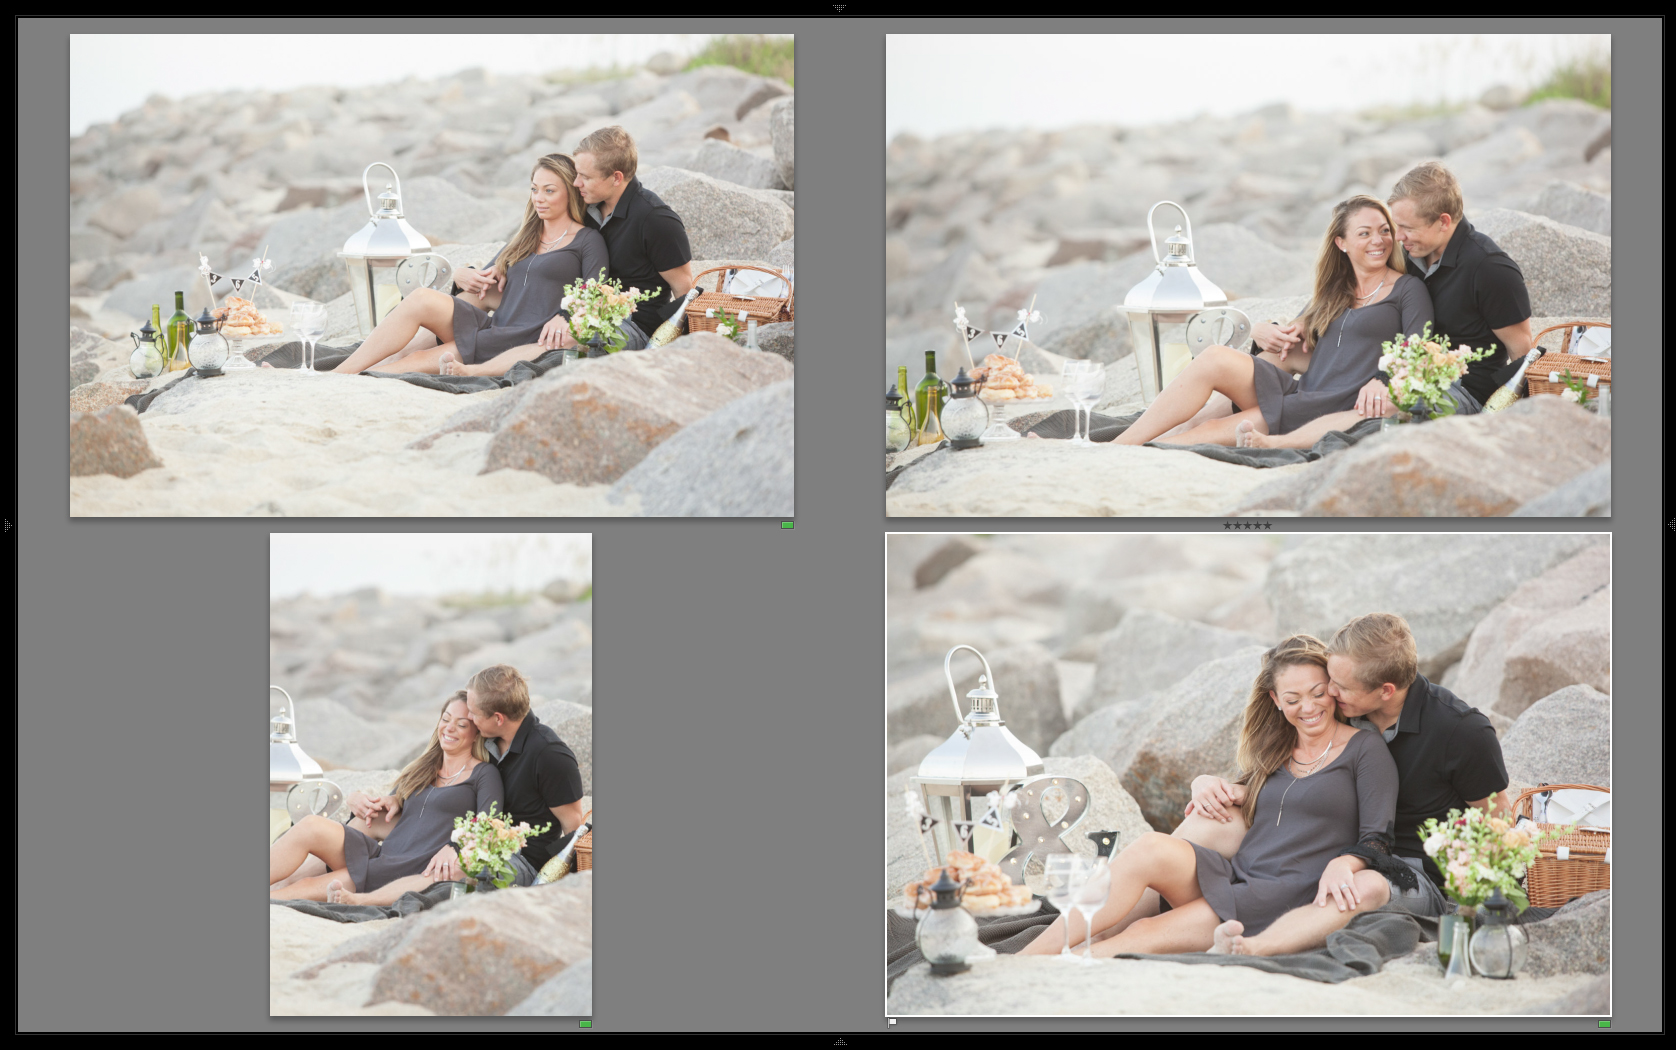
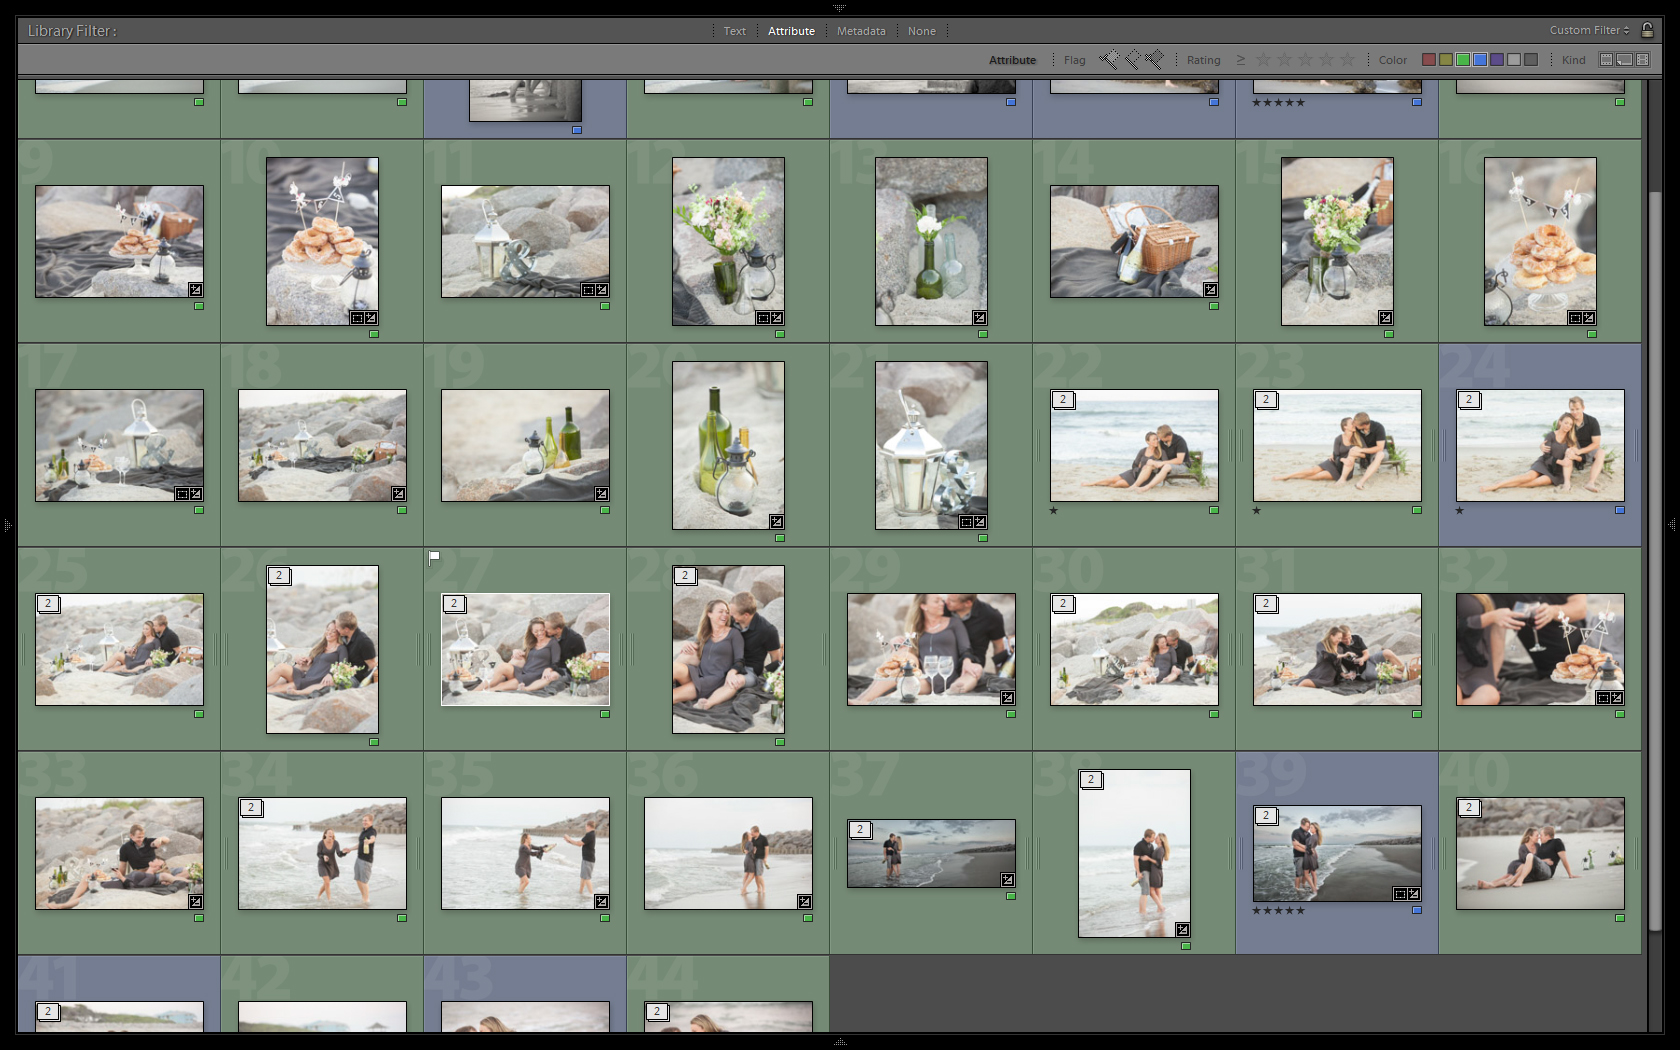
To help the client choose their favorites, I usually choose 2-4 images that are similar, and pull them up on the screen in Survey mode. This allows the clients to compare the images and choose without having to look at each image individually. I mark their favorites using the Pick flag, and also mark any images they don’t like using the Reject flag. I mark any images they ultimately order with the color blue (to match indigosilver’s logo!) so that they can quickly see which they’ve ordered and whether they’ve forgotten a favorite.
Designing Your Products to Sell
Now that the client has chosen their images, it’s time to start designing their products! This client has chosen a wall collage and an album. I marked the collage images blue, the album images green, and it’s time to start designing. The drawback to using Lightroom is that these images would now need to be exported into jpeg format before I can design anything. If I am designing with the client present, this may take a few minutes, during which I’d desperately go get Jeff and ask him to make small talk to keep the clients entertained. Had I done the initial cull using Fundy’s new sales tool in Gallery Designer, I would be able to move seamlessly into the collage design, though it may mean changing up my process slightly. Jeff and I are excited to explore the possibilities here.
I can show the configuration to my clients to scale in their own living room, which helps clients realize that a bigger collage has more impact.
There are advantages to keeping your clients around for the design process. Often times, a client might envision a collage with two or three canvases during the pre-session consultation. And yet, during the sales appointment, they’ve chosen eight or nine favorites. With Gallery Designer, I can reconcile those differences by showing the clients how a collage might look on their own wall. I can show them different options right on the spot, from a simple diptych to a complex 8-image grid, and they can decide which they like the best. Hint: it’s usually NOT the basic diptych.
For example, here are some canvas collages Gallery Designer suggested using my clients’ favorites:

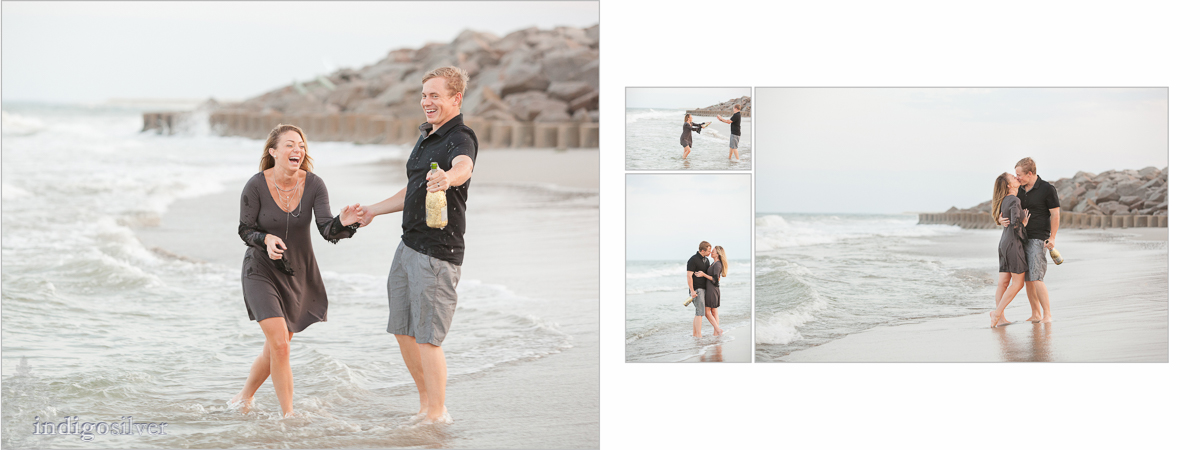
Personally, my favorite style of collage is the “Main + Supporting” described in this recent blog post, featuring one amazing image and then letting the others add to the story. In trying to use all eight of my clients’ favorites, we can start to see that those supporting images are getting lost in the layout.
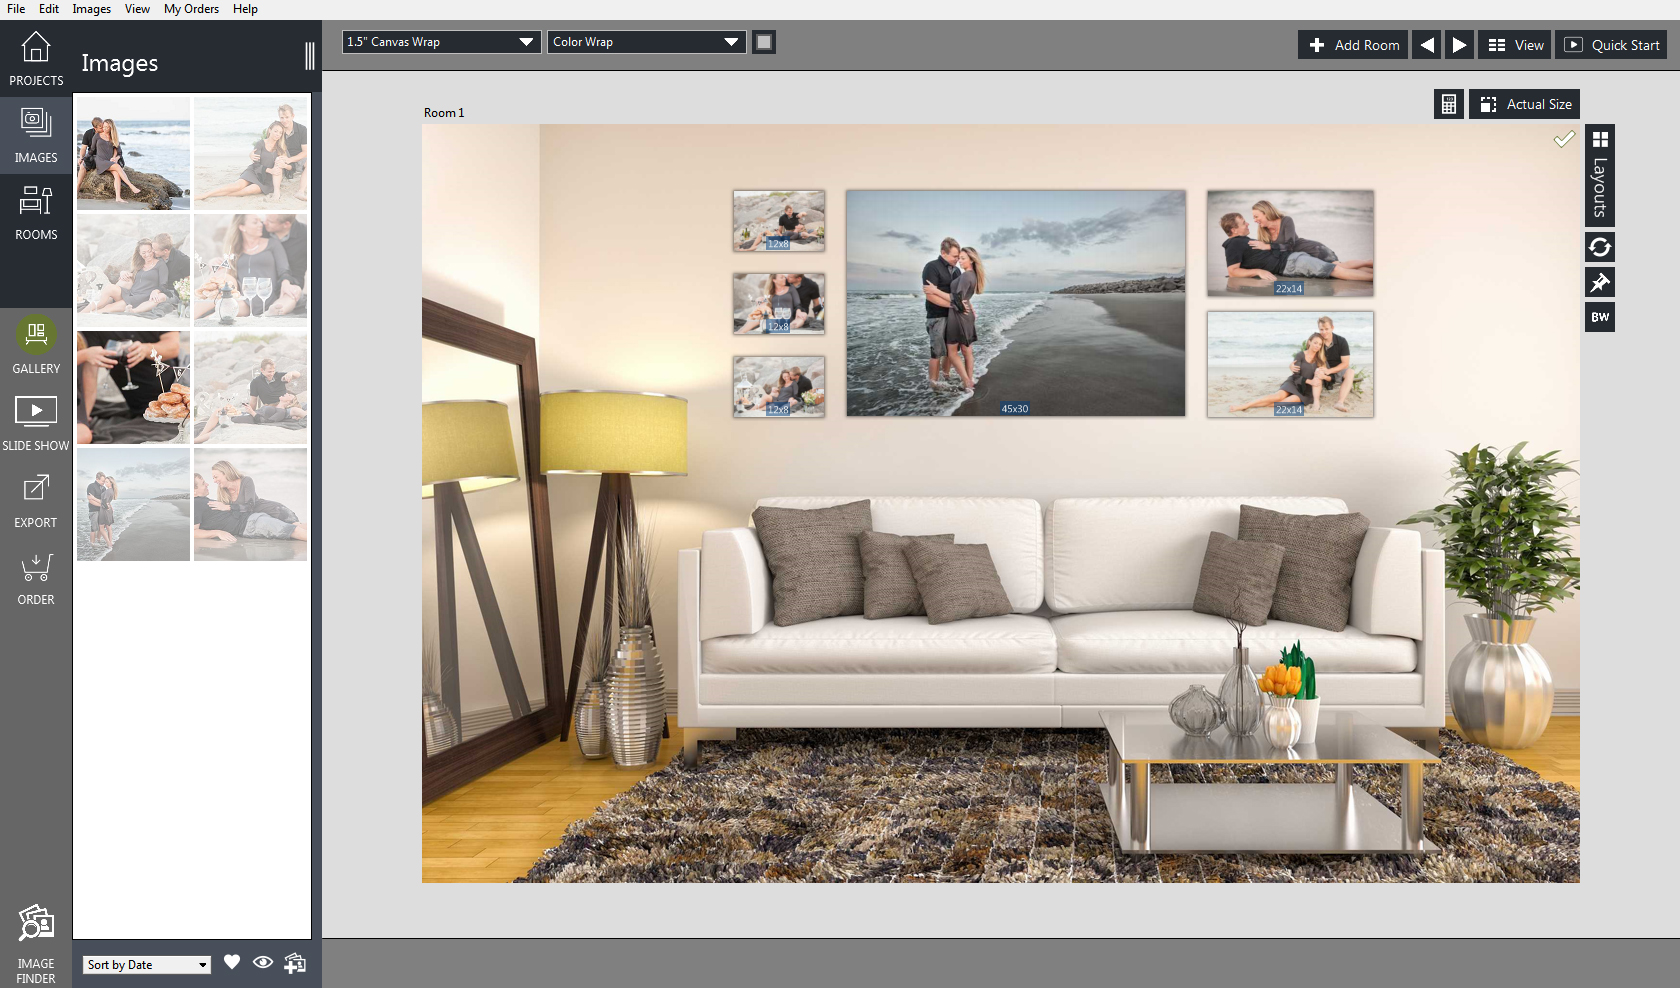
The configuration we like uses six of the eight images, allowing those supporting images a little more real estate on the wall. I can show the configuration to my clients to scale in their own living room, which helps clients realize that a bigger collage has more impact. By having them present, they can decide on the spot whether they’re willing to upgrade from that diptych.
Notice how well a pre-session consultation can pay off – our grey color scheme with the wardrobe and location works perfectly with the décor in the clients’ home. Color harmony is very important to me as an artist, and there’s still something a little off in this design. The two images on the right seem to fight with each other, as equal weight is given to both a grey and a blue image. Also, the three images on the left feel a little busy. A simple switch gives this new result in a matter of seconds:
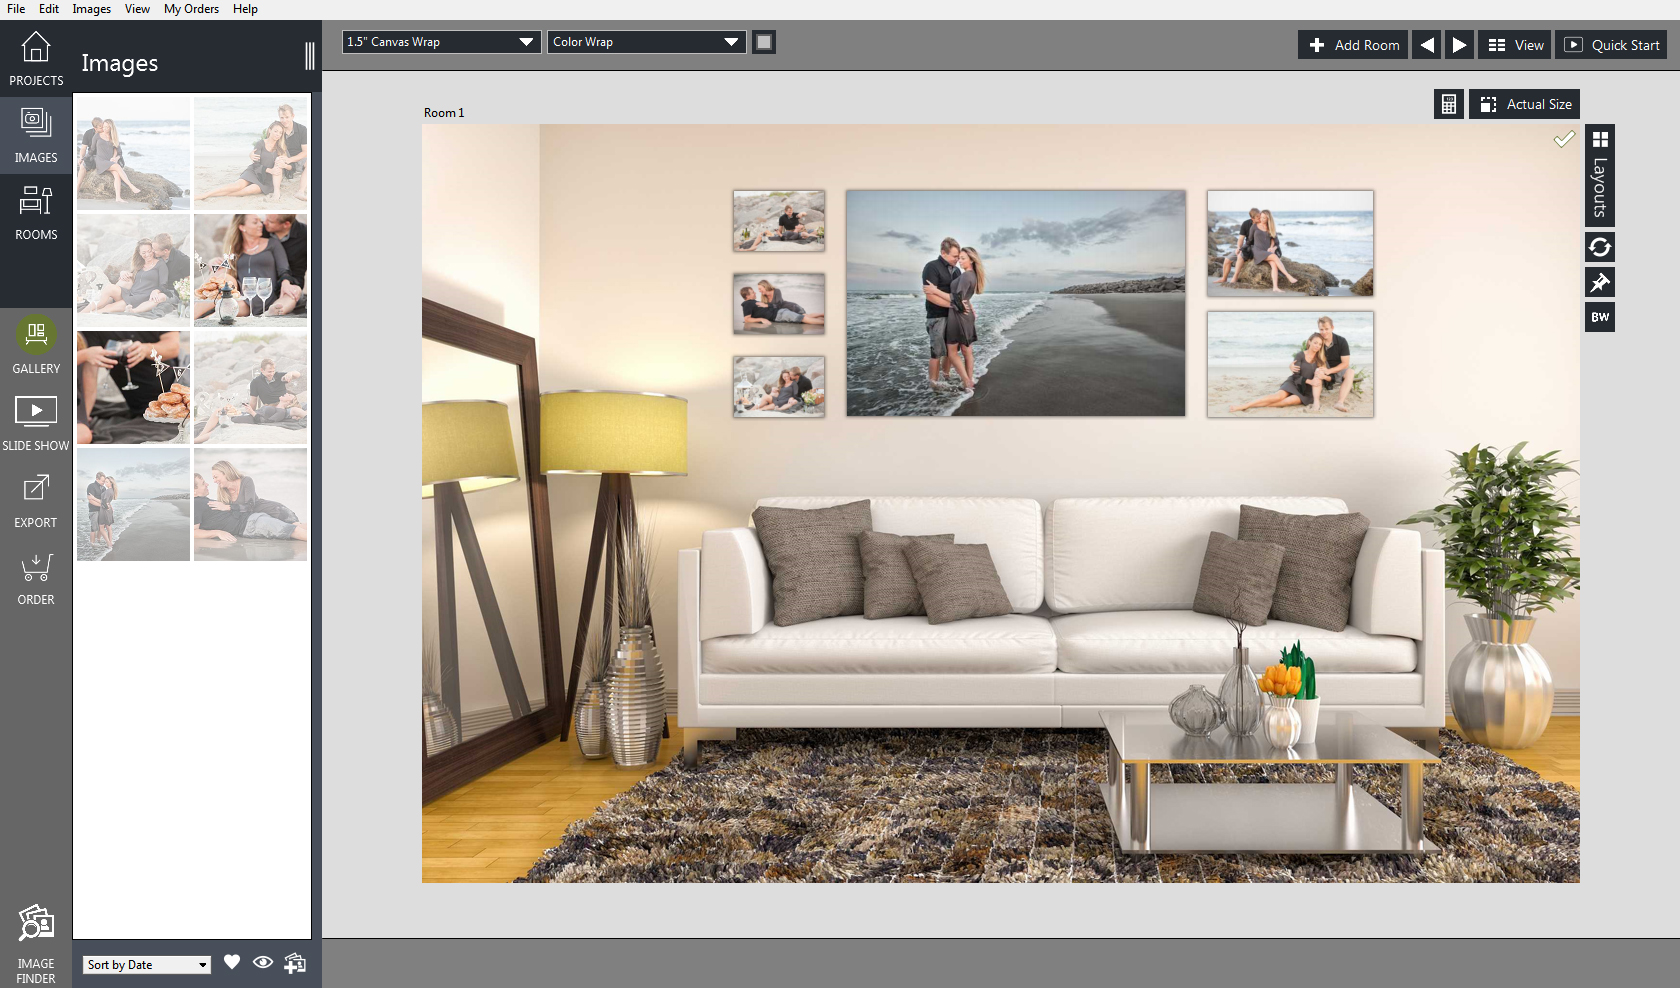
Better, see? In one sales meeting, we now have the perfect collage that our clients have fallen in love with, they’ve upgraded themselves from the diptych. And yet, our clients are happy and excited to have such beautiful artwork in their home. By showing them the possibilities, we exceeded their expectations! This process certainly would not have happened had we simply placed the images in an online gallery for our clients to choose.
In one sales meeting, we now have the perfect collage that our clients have fallen in love with…
The Album
From here, we would then move into album design. With portrait albums, our clients purchase a certain number of images. Once they’ve chosen the album style and images, there is less input needed from them, so we don’t ask them to stay at the studio during album design. Truth be told, we may not want them knowing exactly how quickly our albums are designed in Fundy! On the other hand, they are always very impressed with our turnaround time and the quality of our albums.
Wedding albums involve a completely different process for design and client input – that’s a topic for another blog post!
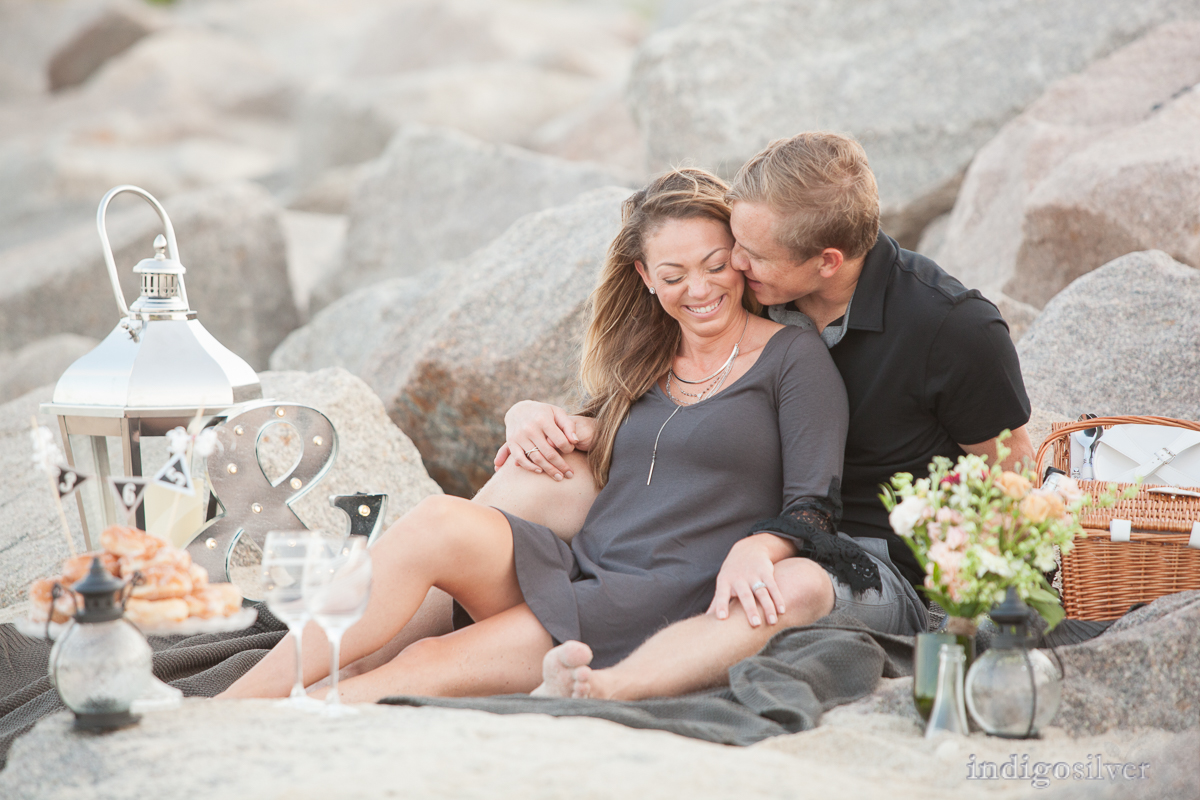
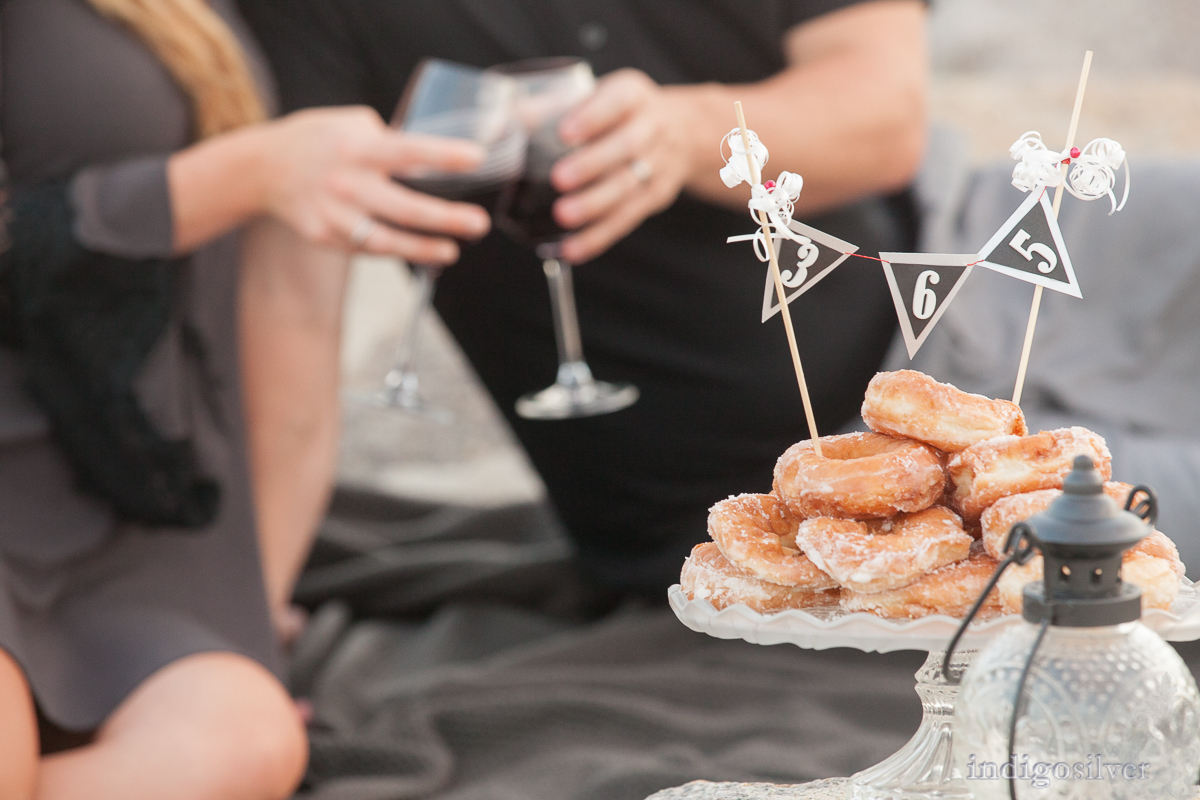
Either way, albums are still a part of our shoot-to-sell strategy. Because we knew our clients wanted an album, we made sure to capture enough variety and tell multiple stories throughout their shoot, such that the wall collage on its own would not be enough.
So really, shooting to sell comes down to vision: making sure that you and your client have the same vision prior to the shoot, and then delivering on that vision with the images you create and the products your clients take home. If you can do all of that, it’s virtually impossible for your clients not to buy, or for them to have buyer’s remorse about their purchase. As a bonus, when you can exceed their expectations, they come back…and bring their friends!
For more information on indigosilver studios, visit their website or follow them on Facebook.


