
Wedding photographers are insane. Who else would even consider the backend post production that is a wedding? That sheer volume of work alone is enough to turn many away from weddings entirely and others to sit paralyzed with anxiety in the middle of a busy wedding season.
The workflow is brutal. If you’re not on top of your workflow, you’ll be waking up in the middle of wedding season with panic attacks. It will destroy any life you think you have…literally. For every hour you spend shooting at a wedding, there can easily be up to five hours of post production.
Workflow begins the moment you pick up your camera and ends the moment you deliver the wedding album. The goal is to work smarter, not harder. And to enjoy a better quality of life, better sales and spend more time behind the camera being creative.
Here’s the thing about workflow. You ask 10 photographers about the best workflow and you’ll get 10 different answers. Everyone’s workflow will cross at different points and ultimately, they’re all relevant and valid. But everyone can learn something by evaluating different workflows.
As a professional wedding photographer with 20 years of weddings under my belt, I have a few tips to share. Between 2008-2009, I photographed 42 weddings. I learned my limitations. Survival meant developing an efficient post-production methodology. I started teaching workflow locally in 2005 and my notes spilled over three pages. That dropped to one page in 2008 and is even smaller now. We live in amazing times and today’s software means it’s possible to create a far more streamlined workflow than it was just five years ago.
The end is the beginning.
The moment you pick up your camera, shoot with story in mind. Think like a cinematic storyteller with scene setting shots, details and authentic moments that tell the story. From a technical standpoint, manual exposure and custom white balance are your friends.
A brutal truth about photographing weddings is the time constraints are a pressure cooker. It’s easy to justify putting your camera on Aperture priority, your flash on E-TTL and call it a day. I’ll fix it later. But this is going to kill you on the backend when you have to manually adjust each RAW file. Taking a few extra steps when you shoot will save you countless hours of post production.
Let’s take formal portraits. You pick a location, set your camera on a tripod, place lights and jump into the most dreaded part of the wedding day–for guests and photographers. Here’s the tip. Using whatever method works best for you, nail your exposure and your lighting. Put your camera and lights in manual mode and lock it down. Use the custom white balance setting on your camera and if you don’t how to do that, learn. At the very least take your white balance setting off Auto and choose a preset or select a Kelvin color temperature setting that gets you close.
Later, when you’re editing in Lightroom, all you do is select the first image and make the adjustments to make it perfect. Then select all your formal shots and sync those settings across the entire set. Bam! A huge chunk of images from your wedding are instantly and perfectly finished. Works great for receptions, too.
The secret to editing.
There’s a method to this madness and while individual choices may vary, this is the secret sauce of workflow. But first, let me share a simple philosophy that took me years to adopt. Are you ready? Delete is your friend. Yes, I understand that every single time you pressed the shutter, a masterpiece was created and it’s impossible to toss it, but this one single mantra will change your life. And your clients will thank you for it. Trust me on this.
Remember what I said about beginning with the end in mind? What is the ultimate expression of a wedding day story? A wedding album! And a typical wedding album features 60-120 images. You came home with 2,000+ images, even more if you work with a second shooter. Repeat after me. Delete is your friend. If trying to sort through all those images is daunting for you, imagine how overwhelmed your clients will be.
The beauty that is Photo Mechanic.
One hard drive is dedicated to client files. A folder is created for each wedding using the couple’s first names and the wedding date. This becomes a unique, 6-digit serial number. (Nathan and Rebecca 071914) Inside this folder, create another called RAW.
Next, ingest your cards. I highly recommend Photo Mechanic. You can ingest multiple cards at the same time using multiple readers and a powered, USB hub. Before the ingest process, open up Photo Mechanic’s IPTC Stationary Pad and enter client details (Wedding of Nathan and Rebecca on July 19, 2014 at Mt. Hood Organic Farms. © Randy Kepple Photographs). Enter in licensing terms, location, keywords and copyright details such as contact information, email and website. All of this is automatically embedded to each file as it’s copied to your hard drive.

Once the ingest process has finished, I open up a contact sheet and quickly scan through all the images to ensure everything is there and there are no issues such as corrupt files or missing cards. Once I’m satisfied that everything is there, I immediately perform a “Smart Backup” using Super Duper to a mirrored, cloned backup drive. It’s important to have your files backed up at all times in at least three locations. (CF/SD cards, hard drive and backup drive).
At this point, what you decide to do is up to you. Some photographers archive to cloud backup services and this would be a good time to start the upload process. Especially if you have a wedding the next day. I used to archive all my RAW files to DVD but have stopped doing that in recent years. I’ve had expensive, archival DVD media fail to read after a few months. I simply don’t trust them and they take forever to read.
The editing process
Here’s a personal tip. Let it sit for a week. It’s hard to start editing immediately. You’re too close to the wedding and the edit will be tighter when you have the perspective of a week behind you. It’s easier to be more objective and select only the best of the best to tell the story. (Remember, delete is your friend!)
My process is an “edit in” which took me years to wrap my head around. I’m still not sure why it works as well as it does, but it’s the best thing I’ve ever done. The editing process is the bane of my existence. I dread it more than any step in the process. Learning to “edit in” was a paradigm shift.
The “edit in” process is similar in theory to the days of film and contact sheets where you’d circle the ones you wanted to print. Photo Mechanic replicates that with digital contact sheets. Double-click your first image and it fills your screen. Use the left/right arrow keys to quickly navigate through an entire wedding. Use the “t” key to tag the photos you want to keep. There is nothing that can touch the speed of Photo Mechanic when it comes to editing a wedding of RAW files. Nothing.
After the first pass, I click out of Preview mode and go back to Contact Sheet mode. Select “View>Untagged” from the menu and delete all the untagged images. Then select “View>Tagged” from the menu and edit to the final selections. The final set of images are then batch renamed (Photo Mechanic menu item) to a sequential three digit number.
RAW file conversion
Now that I’ve edited the wedding to a final set of selects, I bring them into Adobe Lightroom for the conversion from RAW to full resolution JPEG.
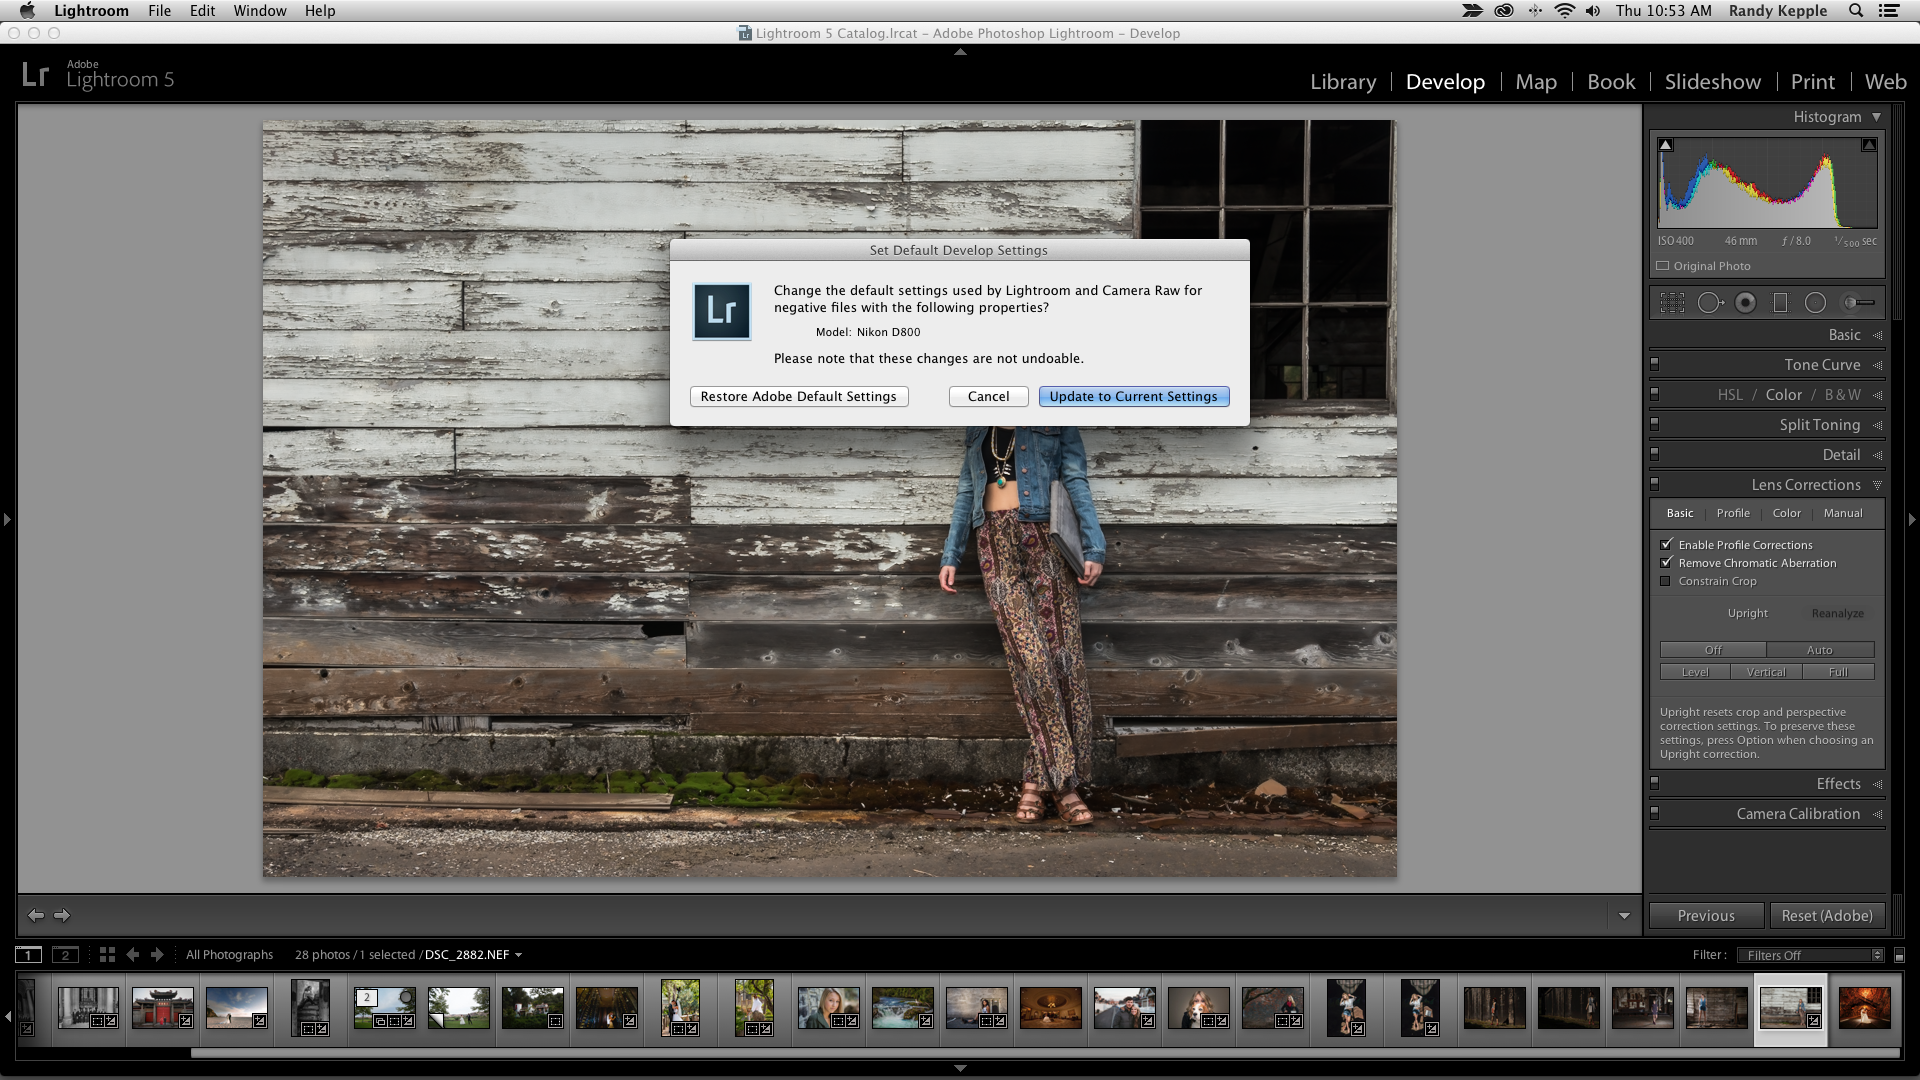
A quick tip before importing into Lightroom. My files tend to be very consistent in how I set up my adjustments in Lightroom. Rather than waste time getting Lightroom dialed in to my style of shooting, I saved my personal settings as a camera default. You can create a separate default setting for each camera body. Great time saver if you have different camera bodies or a second shooter with a different camera. Lightroom registers this default choice for each camera body and applies those settings on import. Great way to quickly get you closer to your final settings.
Once I finish the images in Lightroom, I export full resolution JPEGs to a new folder labeled Finals. Then I go to Lightroom’s Library mode and select all my images and choose File>Save to save my settings as .xmp sidecar files. This is where my workflow is different from many photographers. I don’t save catalogs with every wedding I’ve shot for years on end. When it comes to weddings, the workflow is about keeping things simple. I’d rather save my RAW and sidecar files so if I ever need to pull up a RAW file and export a new version, my original settings are retained. I like keeping Lightroom running lean and mean.
Showcasing your signature style
At this point, the only thing left to do is pull the 20+ images I want to showcase. You know which ones I’m talking about. The bride and groom in the field at sunset with the mountain in the background. The ones that you had a vision for when you shot them–the showcase art shots. These are the marketing shots you’ll use when sharing on social media sites and in your portfolio.
This is where things will shift depending on the wedding. Last week, I reviewed the new Alien Skin Exposure 6 and it’s ideally suited to bringing in sets of images to do additional fine art tweaks, color grading and special effects. I also use Totally Rad’s RadLab (which isn’t getting enough love in my opinion). You’ll notice that I’m not spending hours retouching wrinkles, sweat and cigarette butts. Save that for wall prints and wedding albums or you’ll never have a life again. Finally, I always back up my work using Super Duper to my mirrored drive.
Ready for prime time
The final stages of workflow depend on what you deliver to your client. This is where market differences and individual photographers’ packages come into play. If you deliver high resolution files to your clients as part of your wedding package (as I do) then you can take advantage of the many wonderful cloud services for photographers.
The two most popular are PhotoShelter and Zenfolio which both offer great workflows. You upload your finished files and create galleries which can be password protected and sent out to your clients to share with family and friends. You can attach print ordering and all sorts of great options depending on how you set up your account. Best of all, you can password protect the full resolution digital files, separate from the gallery login. This is a great way to deliver high resolution files to your couples. I always upload a JPEG studio photo release with the photos.
Zenfolio has recently added the ability to upload RAW files, so not only does this serve as a client gallery and shopping cart, it’s also an instant archive service. That means your work is always archived to three places at all times. Using an offsite cloud service gives you peace of mind. PhotoShelter works very similarly.
Social media and wedding albums
The final steps in my workflow are quickly accomplished using Fundy Designer. Just like the commercial, I’m not just a contributor, I’m also a client! Final steps include posting to social media sites (Facebook, Instagram and a blog) watermarked and branded proofs and designing a wedding album, along with parent books.
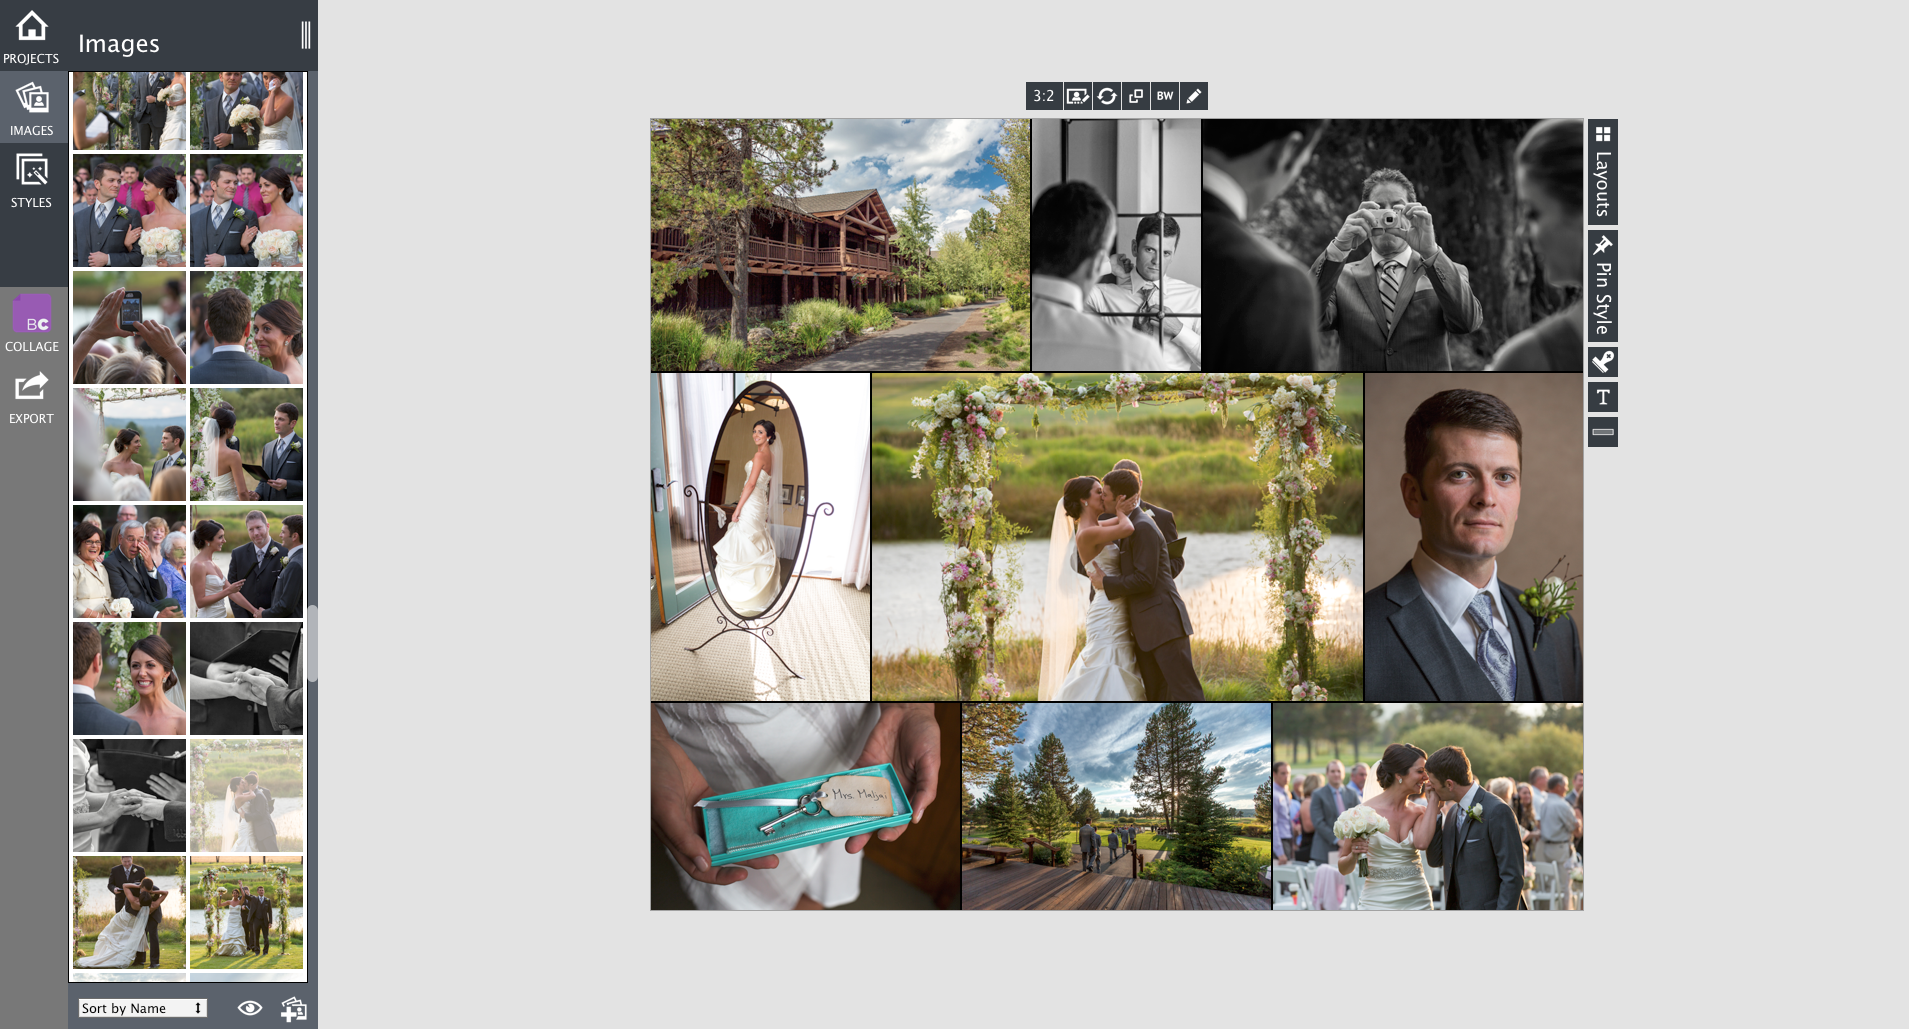
Blog Collage is one of my favorite tools, hands down. It’s fun bringing in your favorite images from a wedding and create a compelling collage in seconds. Add your logo and post to your blog and Facebook page. Image Brander can create a set of low resolution, studio branded files your clients can share on their personal Facebook pages. Place your logo or copyright text on the image and export them @ 1000 pixels.
The final step is the wedding album. Clients can select and save their favorites with Zenfolio galleries. There is even an option to share these favorites with the photographer. Quickly bring those images into Album Builder and design their wedding album using any number of book binders. The creative possibilities are endless and you’ll spend more time designing compelling wedding albums and less time dealing with Photoshop.
Also worth mentioning is outsourcing your post production. I’ve discussed this with many photographers and it’s a valid workflow. Lavalu is a highly rated company that offers this service. Let them do all the heavy lifting and then you can pull your favorites to stylize for marketing.
Work smarter, not harder
There’s simply no way around the time it takes to shoot and deliver a wedding. It’s a daunting task and definitely not for the faint of heart. That’s why there’s a special place in heaven for wedding photographers. Of that I am certain. Remember to keep the end in mind when you start. Delete is your friend. Stay focused and breathe. Working smarter, not harder is the secret to wedding photography production workflow. And there’s never been a better time to be a wedding photographer!
By the way, our friends over at Zenfolio have set up an exclusive discount for 20% off the first year’s service with any account level. The discount code is FUNDY20 which expires on Aug. 31, 2014, so jump to it!
If you have any questions or want to share your thoughts about workflow, please comment below.


