An album reprint can be a costly mistake, going well into the hundreds of dollars. In this blog post we’ll cover how to use bleed lines and guides, why they are important, how to create and use them, and how the white space buffer can help you with this.
How Albums Are Made and Why This is Important
Ever wonder how album companies get all the pages to line up perfectly when they bind their books? How the heck do they do that? The simple answer is that they don’t. It’s impossible to get pages to line up with each other, especially when they’ve been folded in half and glued together.

After gluing all of the pages together, and before putting on the cover, album companies use a large guillotine cutter to lop off the rough edges. This is where those guidelines come in. Album companies say, “hey, if you keep your photos inside of this line, they won’t be lopped off.” But what does this really mean when you are designing?
Making It Easy to Understand
In this little tutorial, we’ll make it very easy to understand. Follow these simple rules and you’ll never make a mistake.
1. Never line a photo up right on the line.
Album makers can’t guarantee where the cut will be. They can only guarantee that it will be somewhere between the edge of the paper and the guideline.

2. Never go just over the line.
If you think you’ll be safe by going just over the line. You are wrong. You could still end up with a strange white edge because the album company cut just before the edge of the photo.

3. Never get too close to the edge.
If the album company does cut right on the line, your photo will look pretty funny with that thin white border.

So, what do we do?
Well, here it is in two easy steps.
1. Stay well within the cut lines.
White space is your friend. Stay well within the guides and let your photos breathe a bit.

2. Go all the way to the edge of the page.
Or go all the way to the edge, so you are 100% sure the image will be cut into. This works well with larger, wider shots where it doesn’t matter if you lose some of the background.

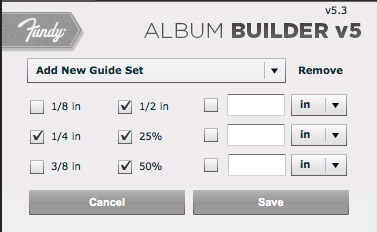
Making Custom Guide Sets
First, click the Edit button in your “Choose Album” in Album Builder.
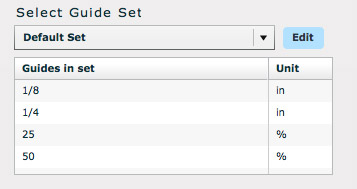
Next, you’ll want to find the recommended guides from your album company and put them into Album Builder. (note: 25% and 50% are the guides down the middle of the spread and the middle of the pages).
Once you save it, you can access it anytime under your Guides when choosing an Album.
Controlling The White Space Buffer
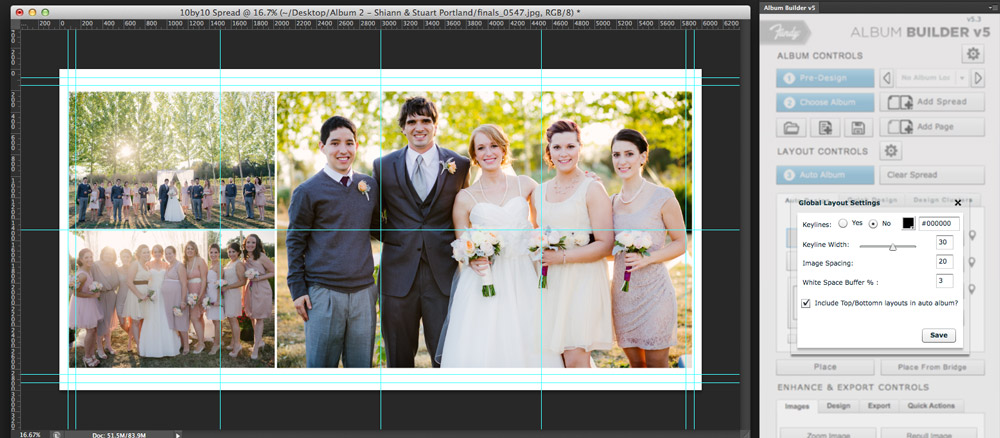
In the above screenshot, I’ve opened the LAYOUT CONTROLS settings. You see that I set my “white space buffer” to 3 so I could give an example of the images going over the guide lines. It’s a good idea to do a couple test layouts and play around with the white space buffer to find the sweet spot for your design style and your album company. This white space buffer creates a global buffer around your images.

Here, after adjusting the white space buffer, the images sit much better on the spread here. By making the white space buffer larger, it increased the amount of white space around my images, which can be for design effect or to watch your cutlines.
Conclusion
Albums are probably the most complex product that photographers offer. It is also the most profitable when you have a fast workflow (which we do our best to help you with). It’s extremely important that you get a good handle on guides, bleed lines and white space. Spend some time on your album companies website learning their recommendations and some time playing around with the options in Album Builder.


