When it comes to the business of photography, whether you’re just starting out or a seasoned professional, one of the essential skills is the art of the headshot. Actors, musicians, politicians, business professionals and singles looking for love all need great headshots. It can be a great source of diversified income or the entire focus of your business.
I’m going to share with you a behind-the-scenes setup of headshots I did for a global footwear company team as well as how I used Zenfolio to streamline the selection process for the photos. The lighting was a basic three-light setup typically used for corporate headshots, similar to what I did for the Fundy Software team photos and the entire shoot was done tethered.
Yep. That’s Right. Tethered.
It used to be that shooting tethered meant dealing with a lot of technical issues and was isolated to the realm of commercial advertising studios with huge budgets and a team of assistants. Technology has simplified the entire process to the point that now that it’s literally plug and play. So, what do you need to make this magic happen?
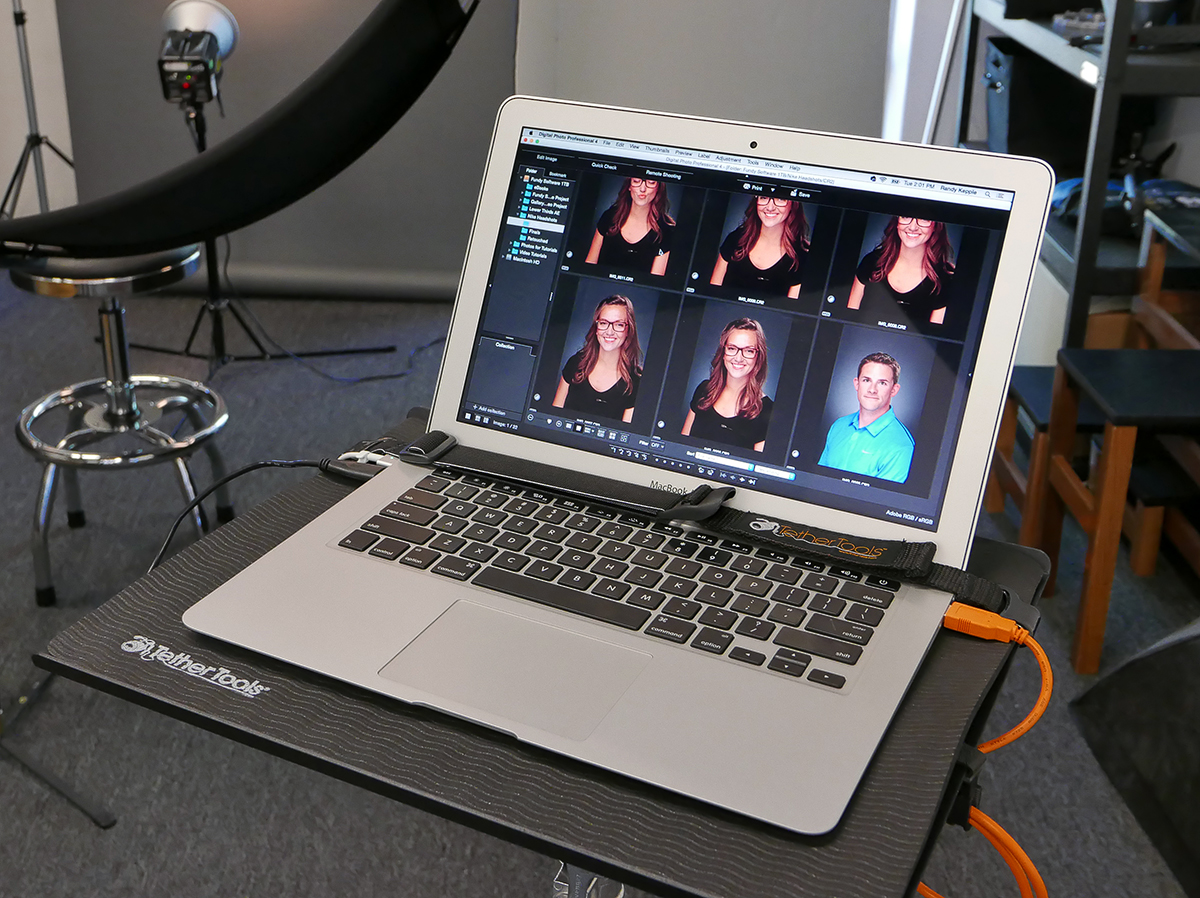
For team headshots, I use an Apple 13-inch MacBook Air and the Canon EOS Utility and Canon Digital Photo Professional (DPP) software. A lot of photographers prefer Phase One’s Capture One Pro or Adobe Lightroom. The Canon software works effortlessly with the Canon 5D MK III. Simply connect your camera to your laptop, launch the EOS Utility and select a destination folder for your images. As you shoot, the images will display almost instantly on the screen in the Canon DPP software. So let’s talk more about tethering.
Whether you’re shooting on location or in a studio, I highly recommend investing in a TetherTools Pro Tethering Kit (less than the cost of one headshot). These guys are the definitive resource for shooting tethered, including a handy Software Finder that shows you what software is available for your camera if you’re wanting to jump into shooting tethered.
The Pro Tethering Kit includes: (1) Tether Table Aero Traveler (T6 aerospace aluminum) (2) Aero ProPad, LAJO-4 ProBracket (connects to lightstand or tripod) (3) TetherPro Premium Cable (high visibility orange and high capacity photo transfer speeds) (4) JerkStopper Tethering Kit (JerkStopper Camera Support and Aero Table Clip-On) (5) SecureStrap (for your laptop) (6) Aero XDC External Drive Compartment (7) StrapMoore and (8) Organizational Soft-sided Case.

The StrapMoore is just about the most versatile product in their line. It attaches to your tripod leg to hold accessories that you need nearby. It’s primarily designed to hold your laptop’s battery pack so it doesn’t dangle off the Tether Table. By securing it in the StrapMoore, you reduce the strain on the port from the brick hanging down, and also keep the brick from resting on the ground getting stepped on or tripped over.
The Aero XDC External Drive Compartment connects to the bottom of the Tether Table. It’s great for backing up images while you shoot but also good for holding phones, color checkers, pens, keys — anything you like to have nearby while you shoot.
Whether you’re on location or in the studio, it’s nice to have your laptop off the ground. Managing cables and cords is essential in keeping your set safe and your equipment secure. The JerkStopper is so much better than gaffers tape or any of the other things photographers do to make sure their cables are secure. No one wants a camera or laptop to come crashing to the floor during a shoot!
Here Are My Top Reasons You Should Be Shooting Tethered Right Now:
Reviewing your images on a big screen. The 5D Mk III has a large 3.2-inch LCD monitor, but the 13-inch monitor on the MacBook Air is exponentially bigger. Being able to review your images on a color calibrated monitor means that your adjustments (white balance, exposure, lighting) will be tighter which saves you invaluable time in post production. Checking your focus is also more accurate than trying to use your camera screen.
Best of all, it keeps everyone away from your camera. The last thing you want is people crowding around the camera or worse, touching the controls and accidentally changing your settings or deleting files.
Confidence and feedback with your subject. When it comes to headshots, this is invaluable. You can take a few shots, then bring them over to the laptop and explain what works and what doesn’t work. How to look more dynamic and engaging. Then they can sit back down in front of the camera and with a little coaching, you can help bring out what’s unique about that person. The difference between the first images and the last images will amaze you. You help instill confidence in your subject. They feel good about themselves and they trust that you are working to make them look their best.
With the team I shot in this case, we had 25 people showing up in groups of five at a time. Having a tethered laptop allowed them to see what I was doing. Everyone was paying attention to how I was coaching the person being photographed and I could show them immediately how to look their very best. That rippled across the entire team and you could feel the energy rise in the room as everyone supported and encouraged their team members.
Shooting remotely is efficient and necessary. There will be times when you’re shooting in a confined location and the logistics can get complicated. Trying to maneuver in and out of a lit set can be tricky and prone to bumping the camera or lights or modifiers. Shooting tethered allows you to control the camera from your computer. Focus, exposure, white balance… all from your computer.
Your work is better. There’s nothing more disheartening than feeling you just captured the best shot of your life and finding out when you’re editing that the focus was off slightly. Or the lighting was not quite as dialed in as you thought. If only you could go back in time. Shooting tethered gives you the ability to see things you’ll miss on your camera screen. Lighting, white balance, exposure and focus are all right there in front of you.
You’ll know immediately if you need to make any adjustments that can’t be handled in post production. That saves you invaluable time. Plus, you don’t need to shoot as much. Once you’ve got what you need, you’ll see it immediately. There’s no surprises (for you or your client)!
Secured redundancy and speed. Shooting tethered is fast. A full resolution file is visible on your screen almost immediately. Because you’re bypassing your camera’s memory card and saving directly to your computer (raid system, external drive, cloud storage), you eliminate the time it takes to transfer your cards after the shoot and avoid any chance of file corruption. I’ve had bad card readers actually corrupt my raw files on the memory card! Once that happens, there’s nothing you can do to salvage those files. They’re gone.
Transferring and writing raw files directly to your computer means they’re ready to edit and you can set up a real-time backup as you shoot (Folder Watch, Super Duper, Carbon Copy Cloner). With tethered shooting, the issue of memory card failure is virtually eliminated and you’ll never have to deal with stopping in the middle of a shoot because your memory card is full.
Instant processing. While your images are coming in, you can apply one of your favorite presets to quickly show what the final image will look like. You can do real time culling of your images as you’re shooting, marking favorites and deleting images that don’t work. If your client falls in love with a particular shot, you can mark it as a favorite which makes your post shoot editing much faster and easier.
With this shoot, I was able to quickly go through the 12+ images with each person before they left, finding out which ones were their favorites and giving them input as to which one I felt was the best. This goes a long ways towards putting your clients at ease before they walk away from the shoot, knowing they trusted the right photographer for the job.
Let’s Talk About Lighting the Headshots
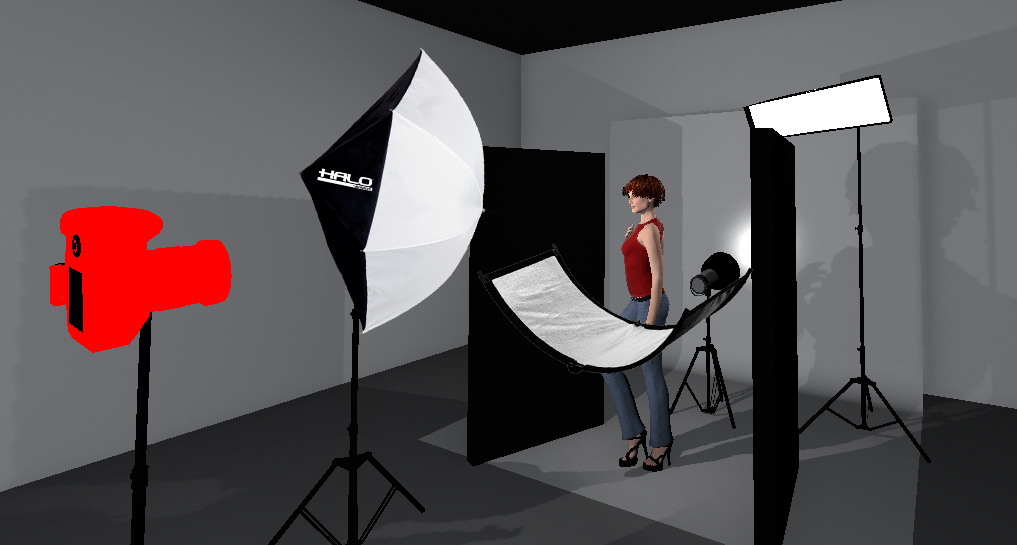
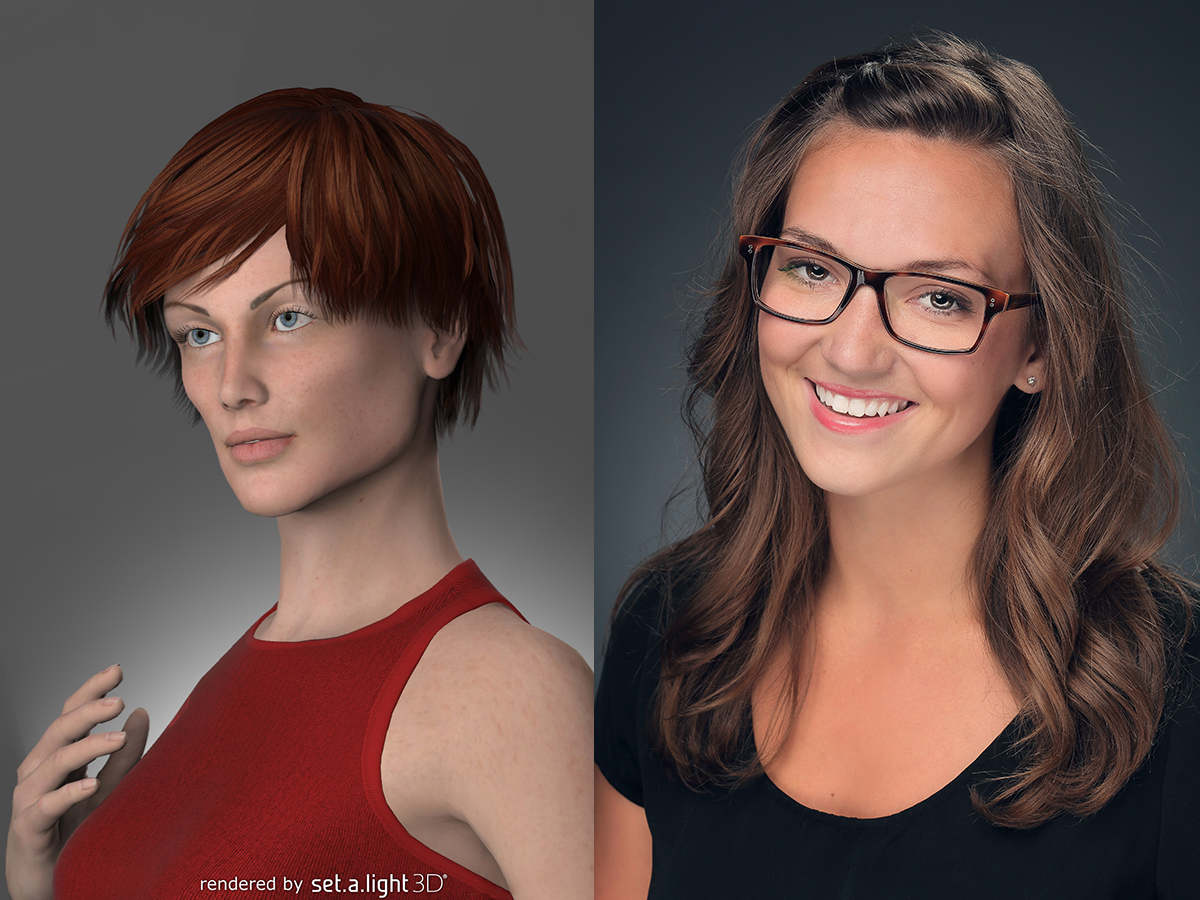
Lighting diagram created using set.a.light 3D
For the main light, I used an AlienBee in a Westcott 45” Round Halo and the very unique Westcott Eyelighter. If you shoot a lot of headshots, I highly recommend checking out the Eyelighter. It was designed for studio portrait photographers and adds a unique catchlight to your subject’s eyes. It takes some testing to really dial it in as it’s easy to overdo the uplighting, creating a “monster light” effect (think flashlight under your chin). Westcott has videos on how to determine the distance from your model and the correct placement of your light. Definitely a great tool for headshots.
The background was a Savage Seamless Background Paper (Thunder Grey #27) and the background light was an AlienBee strobe with a 7″ silver reflector and a 30-degree spot grid. The diffused edge should break between the ear and the shoulder with a nice gradation. This usually has to be fine tuned for each person.
The hair light was another AlienBee strobe placed in a strip softbox. A highlight, if used subtlety, can help separate the subject from the background, but also add a nice highlight to the shoulders, give the hair some nice highlights and add a little “angel kiss” to the side of the face.
Two black “v-flats” were used for subtractive lighting, adding dimension to the sides of the face. The lights were triggered wirelessly using the RadioPopper Jr2 , which I absolutely love. With this amazing piece of tech, you can individually adjust the power settings of your strobes without having to lower and raise your lights, all from the camera.

Finally, all the headshots were photographed using a full frame sensor Canon 5D MK III with a Canon 70-200mm f/4 IS USM lens. Telephoto lenses are more flattering for headshots because of the lens compression. Exposure was set manually to 1/125 @ f/11 (ISO 100). The background and hair light were 1 stop under the main light at f/8. White balance was manually set to 5800K. By using a manual camera setting for exposure and a manual white balance, the post production is substantially faster. You only need to make minor corrections to the first image, then apply those settings to all the remaining images. If you’re shooting tethered, you can get those settings dialed in very precisely and that really helps in turning around the edit and delivery to your client.
Client Communication and Delivery
The final piece of the headshot workflow is presenting the final edit to your client, communicating with them about their final selection, retouching and delivery of the high resolution files. The perfect partner in this workflow is Zenfolio. With Zenfolio, I can upload a gallery of photos and password protect the gallery and email the client a link, all from the Zenfolio dashboard. You can also watermark the previews with your logo or file of your choice, set whether or not they can download the images, even going so far as selecting the size(s) they can download, including the original high resolution files or the entire set.
The client then picks out their favorite image and adds this as a favorite. In this case, each member was able to select their favorite, then send that to me, along with any retouching notes from the gallery. The selects are retouched and then uploaded to the Zenfolio gallery, replacing the proof version. Then, the client is given a separate password to download the high resolution file. Zenfolio is a complete solution, so if you want to offer prints and products, you can do that as well. I even have a license agreement and release form that I upload as a JPEG to my headshot galleries.
Best of all, your Zenfolio gallery becomes an offsite archive of your work. Set an expiration date for the gallery or keep it up indefinitely. I’ve found this is a great source of confidence for my clients. They have the peace of mind their files are available in case they lose them, a hard drive crashes or they’re working outside the office and need access to their headshots.
Wrapping It Up
Doesn’t matter if it’s in your living room, garage or a professional studio – it’s not about shooting quantity. It’s about working with your subject to make every image amazing. The lighting is secondary to getting great expressions from your subject. Facial expressions are everything. Most of the time, you’re not going to be working with professional models, so it’s important to understand how to coach your subject. Learning how to bring the best out in people is not to be understated. Confidence as a photographer is the key to being successful with headshots.
There are as many ways to do a headshot as there are photographers. You need to develop a trained eye, not only for lighting subtleties, but more importantly, to be able to see it while you’re shooting so you can coach your subjects to look their best. It’s all about the face. The fast track to learning this is from headshot guru Peter Hurley. I highly recommend investing in Peter Hurley’s “Illuminating the Face” video, which I reviewed it in this essay and The Art Behind the Headshot.
A good headshot can change people’s lives. That’s not an understatement at all. If they look good, they feel good and if they feel good, they’re confident. There’s nothing more rewarding than seeing your clients getting promoted, elected into office, landing the role of a lifetime or the love of their life. All because of a great headshot!