Photography is an alchemy of sorts, between art and science. So often we focus on the art and neglect the science. And who’d blame you? When it comes to photography, most artists avoid the science part because it reminds them of school and school reminds them of tests!
Don’t worry, there won’t be a test at the end, but understanding resolution and how it applies to digital photography is one of the most important concepts you can learn. And easily one of the most confusing — misunderstood even by seasoned professionals. Photographers deal with science (and art) every day. The relationship between f-stops and shutter speeds is the dance that makes the art happen. The science of optics gives us the ability to capture light and create unique qualities in our art. Thankfully, resolution is not rocket science, it’s simply the number of pixels in your image.
This is where most people turn off their hearing aids or look for something (anything) else to do. But stay with me, because I’m going to break it down so you can learn this once and for all. At the end of the day, it’s about getting the best quality possible from your images. In order to do that, we need to understand some of the factors that determine image resolution.
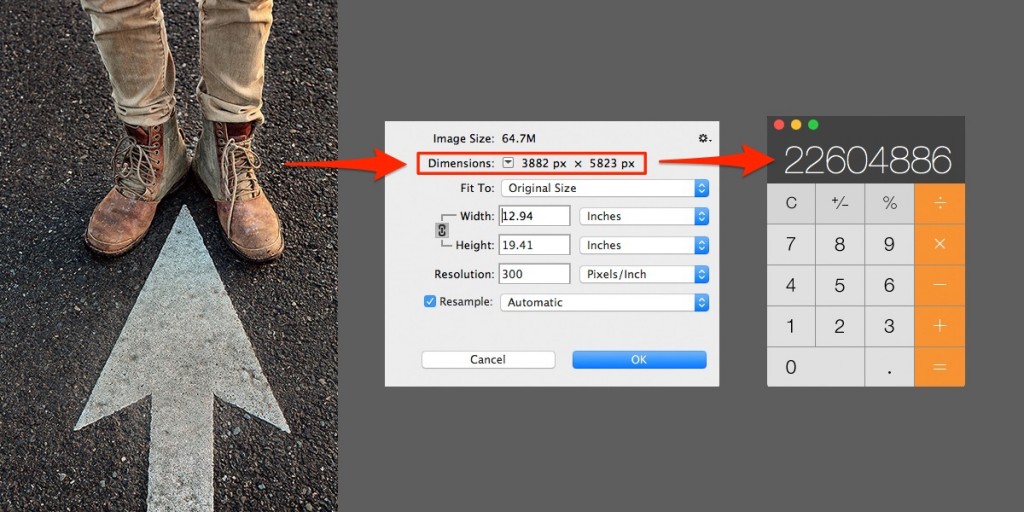
Megapixels (also known as a bunch of pixels) where 1 megapixel = 1 million pixels. Most professional cameras boast 12+MP, which means the image files they create have 12+ million pixels per image. For example, my professional camera is a Canon 5D-Mark III, which is a 22.3MP sensor. If we open an image into Photoshop, we can confirm this by looking at the number of pixels in the image (Image > Image Size). The image has 3,882 horizontal pixels and 5,823 vertical pixels. By multiplying these, you get roughly 22.3 million pixels (megapixels).

The one thing you need to understand at this point is that pixels are absolute. You can change the size and dpi of your image all day long, and as long as you don’t resample your image the number of pixels will never change. Which brings us up to the second part of scaling vs. resizing.
When you scale an image, you are changing the size without adding or subtracting pixels. If you have Resampling toggled off in Photoshop, the dpi will decrease as you scale the image up and decrease as you scale the image down. That’s because the number of pixels are absolute. Imagine a swimming pool filled with water. If you change the size of the pool, all that water has to go somewhere. If you make it smaller, the water becomes more dense and the pool needs to be deeper. If you make the pool bigger, the water is spread and becomes more shallow.
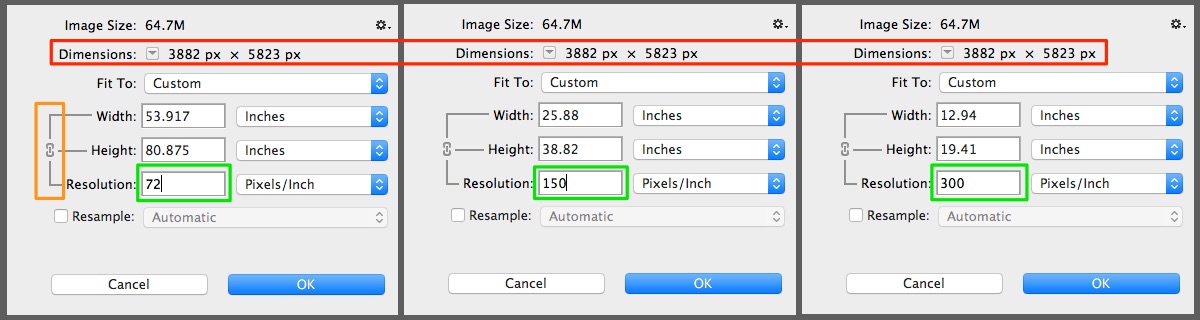
This is the complicated relationship between inches and dpi.
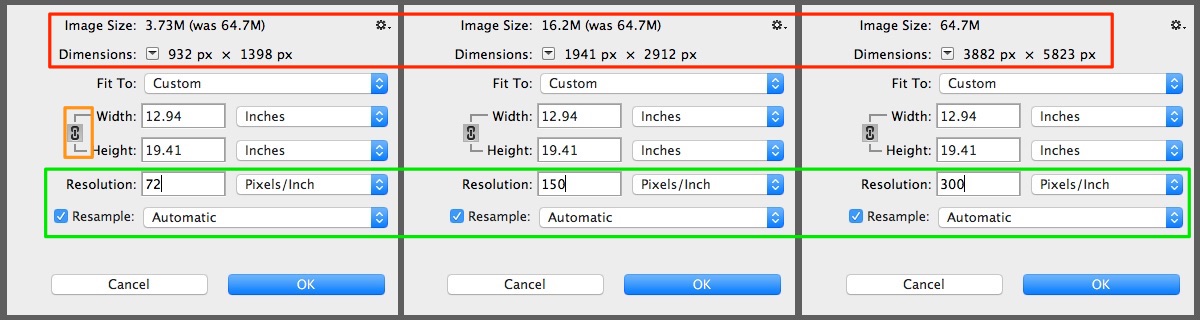
If you have Resampling toggled on, then Photoshop will use a sophisticated algorithm to add or delete pixels to arrive at the size and dpi combination you have entered. Using our swimming pool analogy, if you increase or decrease the size of the pool, you need to add or throw out water to keep it at the same depth. Most photographers refer to this as up-sampling or down-sampling.
This is where most of the confusion comes in. The two values (inches and dpi) are linked, thus the link in Photoshop when changing the image size with resampling turned off. You can’t consider one without the other. This is why if someone tells you they need a file that’s 600 dpi, they’re only halfway there because every file can be measured in dpi.
How much resolution do you need? That’s a good question, and one that can only be answered by what you’re wanting to do. It’s all ppi (pixels per inch) until you go to print, where you live in the world of dpi (dots per inch). Both refer to packing in a certain number of pixels into a square inch where dpi lives in the world of printing and ppi lives in the digital world. If you need 300 pixels per inch, the size of those pixels will be much smaller to fit within that space than the 72 pixels required to fit in the same space.
If you are printing an album or prints to hang on your wall, it’s machine dependent, which is why the dpi changes so much. Some inkjet printers are 150 dpi and professional printers can go as high as 600 dpi (or more). The standard value for most photographers is 250-300 dpi.
At the end of the day, it’s more simple than you think. When it comes to resolution, you only need to know one of two things:
1) The number of pixels (vertically and horizontally)
OR
2) The width and height and ppi resolution (pixels per inch)
It’s honestly that easy. Easier than the question given to Neo (The Matrix) of taking the red pill or the blue pill. The world would be a less confusing place if we all spoke pixels. And for those of you thinking all of this was so much easier back in the days of film, do a quick search on reciprocity failure. Yep. Cue microphone drop.