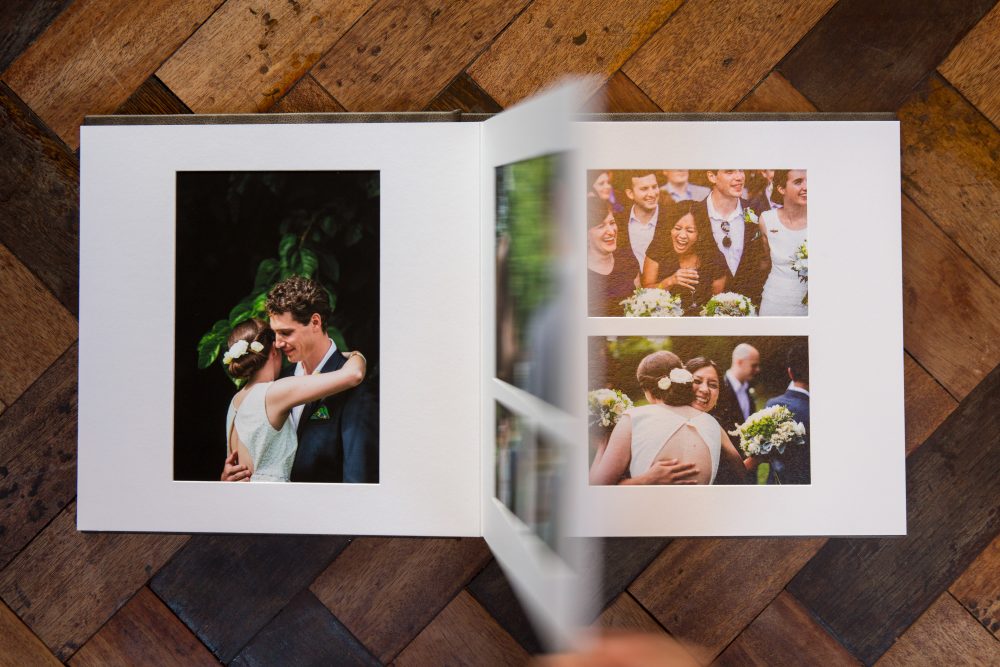
An album reprint can be a costly mistake, going well into the hundreds of dollars. In this blog post we’ll cover how to use cut lines and safe zones, why they are important and how the design buffer can help you with this.
How Albums Are Made and Why This is Important
Ever wonder how album companies get all the pages to line up perfectly when they bind their books? How the heck do they do that? The simple answer is that they don’t. It’s impossible to get pages to line up with each other, especially when they’ve been folded in half and glued together.

After gluing all of the pages together, and before putting on the cover, album companies use a large guillotine cutter to lop off the rough edges. This is where the guidelines come in. Album companies tell you, “If you keep your photos inside of this line, they won’t be lopped off.” But what does this really mean when you are designing?
Making it easy to understand
In this little tutorial, we’ll make it very easy to understand. Follow these simple rules and you’ll never make a mistake.
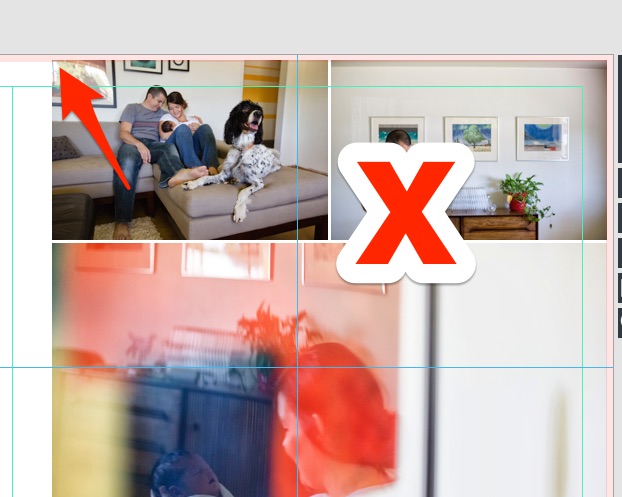
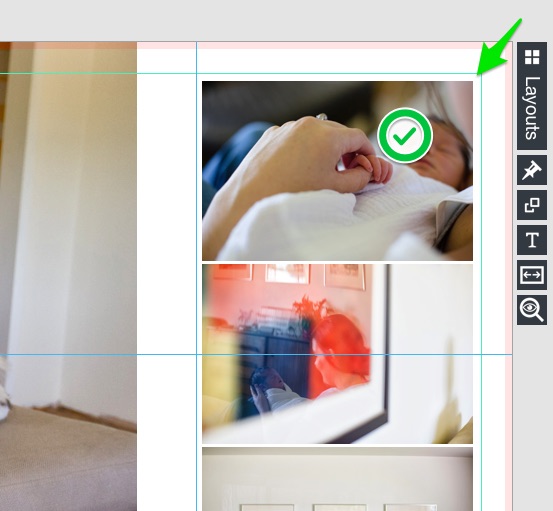
1. Never line a photo up right on the line
Album makers can’t guarantee where the cut will be. They can only guarantee that it will be somewhere between the edge of the paper and the guideline.
2. Never go just over the line
If you think you’ll be safe by going just over the line, you are wrong. You could still end up with a strange white edge because the album company cut just before the edge of the photo.
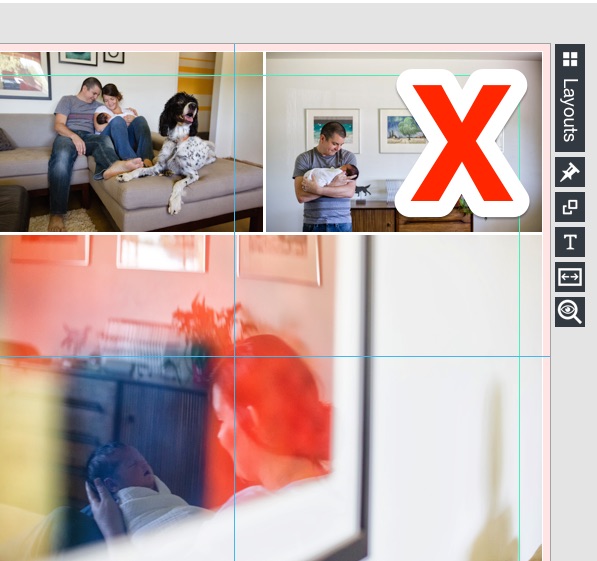
3. Stay out of no man’s land
This is a dangerous area. Keep your images away from the middle of the cut line and the safe zone.
SO, WHAT DO WE DO?
Well, here it is in two easy steps.
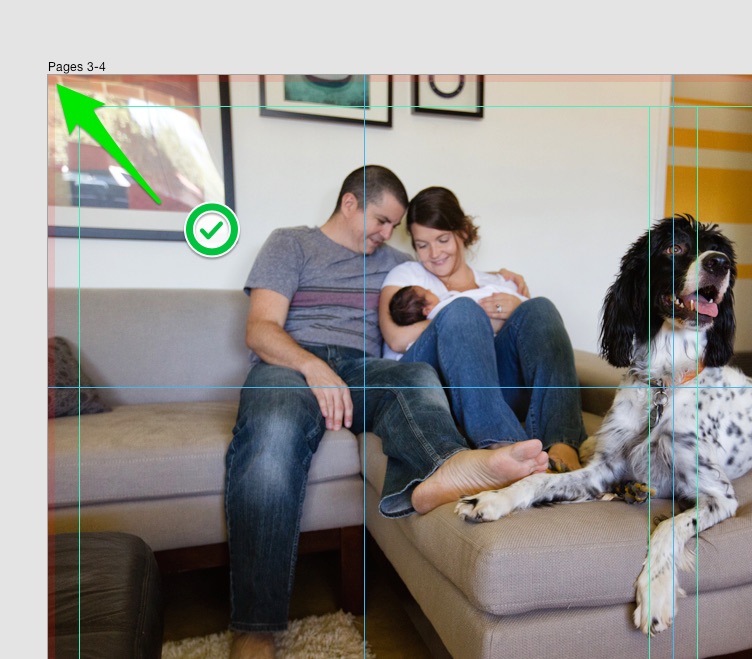
1. Stay inside of the safe zone.
White space is your friend. Stay well within the safe zone and let your photos breathe a bit.
2. Go all the way to the edge of the page.
Or go all the way to the edge, so you are 100% sure the image will be cut into. This works well with larger, wider shots where it doesn’t matter if you lose some of the background.
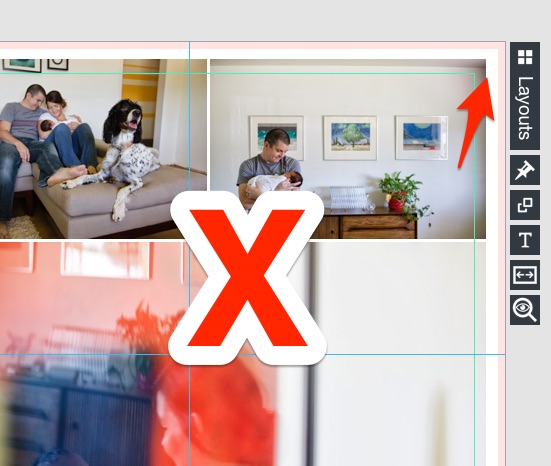
ADJUSTING GUIDES
For all of our Fundy Direct labs, and some of the larger labs, we have the cut and safe zones encoded. For all other labs we set a default of 1/8″ and 1/2″. You can change this in your album settings if needed.
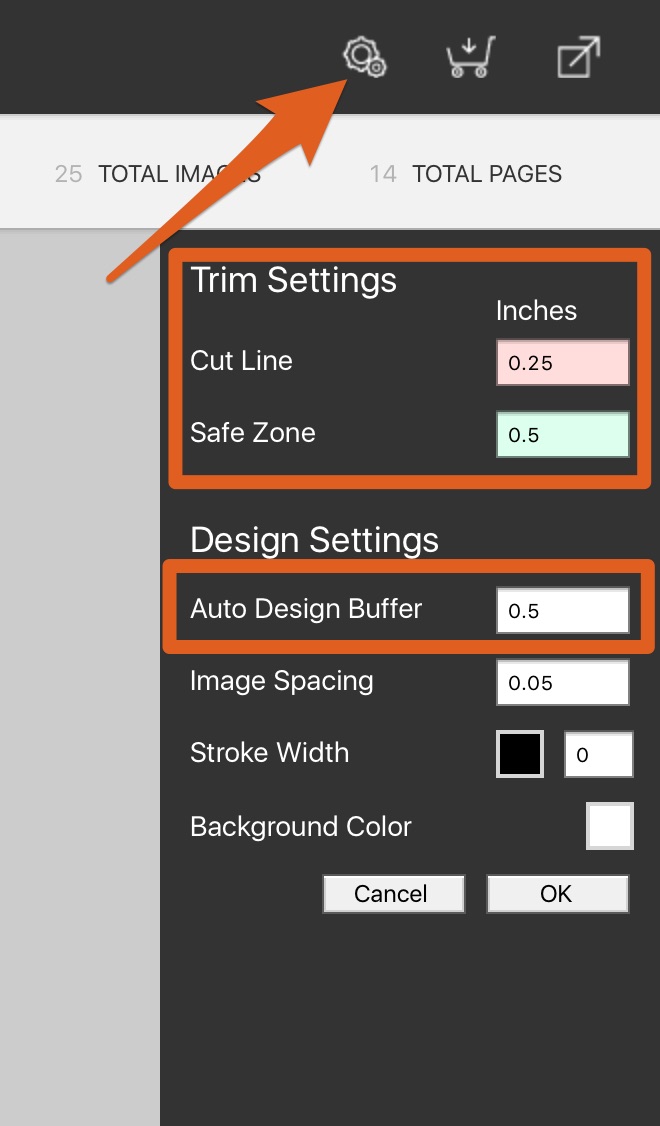
Controlling The Auto Design
When using the auto designs in Fundy Designer, we want to keep your layouts safe. So you will see the “Auto Design Buffer.” This is the distance between the cut line and the safe zone. You have control over this also. It is basically the distance your images will be from the edge of the page AFTER the album is cut. Whenever the Auto Design is applied OR any design from the quick design picker is applied, it will automatically put photos to the edge or up to this buffer. It is the distance from the edge of the cut line, not the edge of the page.

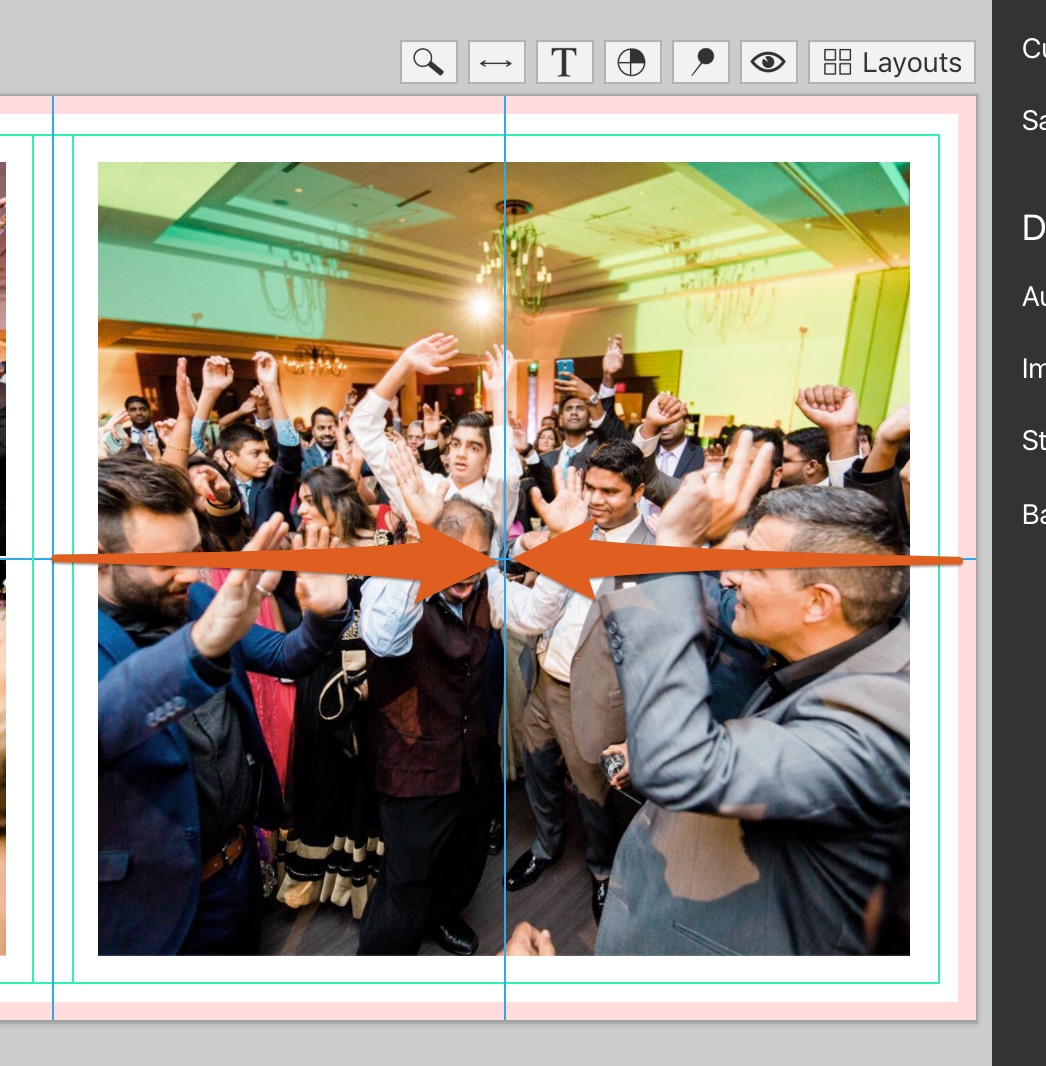
Centering Photos On The Page
Because most book blocks are cut before the album cover is put on, we must center images based on where the photo will be AFTER the book block is cut.
First, our center lines are place halfway between the center of the spread and the inside of the cut line, not the edge of the page.

Additionally, drop zones will auto snap into place onto the center lines.
CONCLUSION
Albums are probably the most complex product that photographers offer. It is also the most profitable when you have a fast workflow (which we do our best to help you with). It’s extremely important that you get a good handle on cut lines, safe zones and page buffers. Spend some time on the websites of your album companies learning their recommendations, and spend some time playing around with the options in Fundy Designer. And remember, keep photos to the edge of the page or within the safe zone. And when centering, photos must respect the portion of the page that will be cut off.