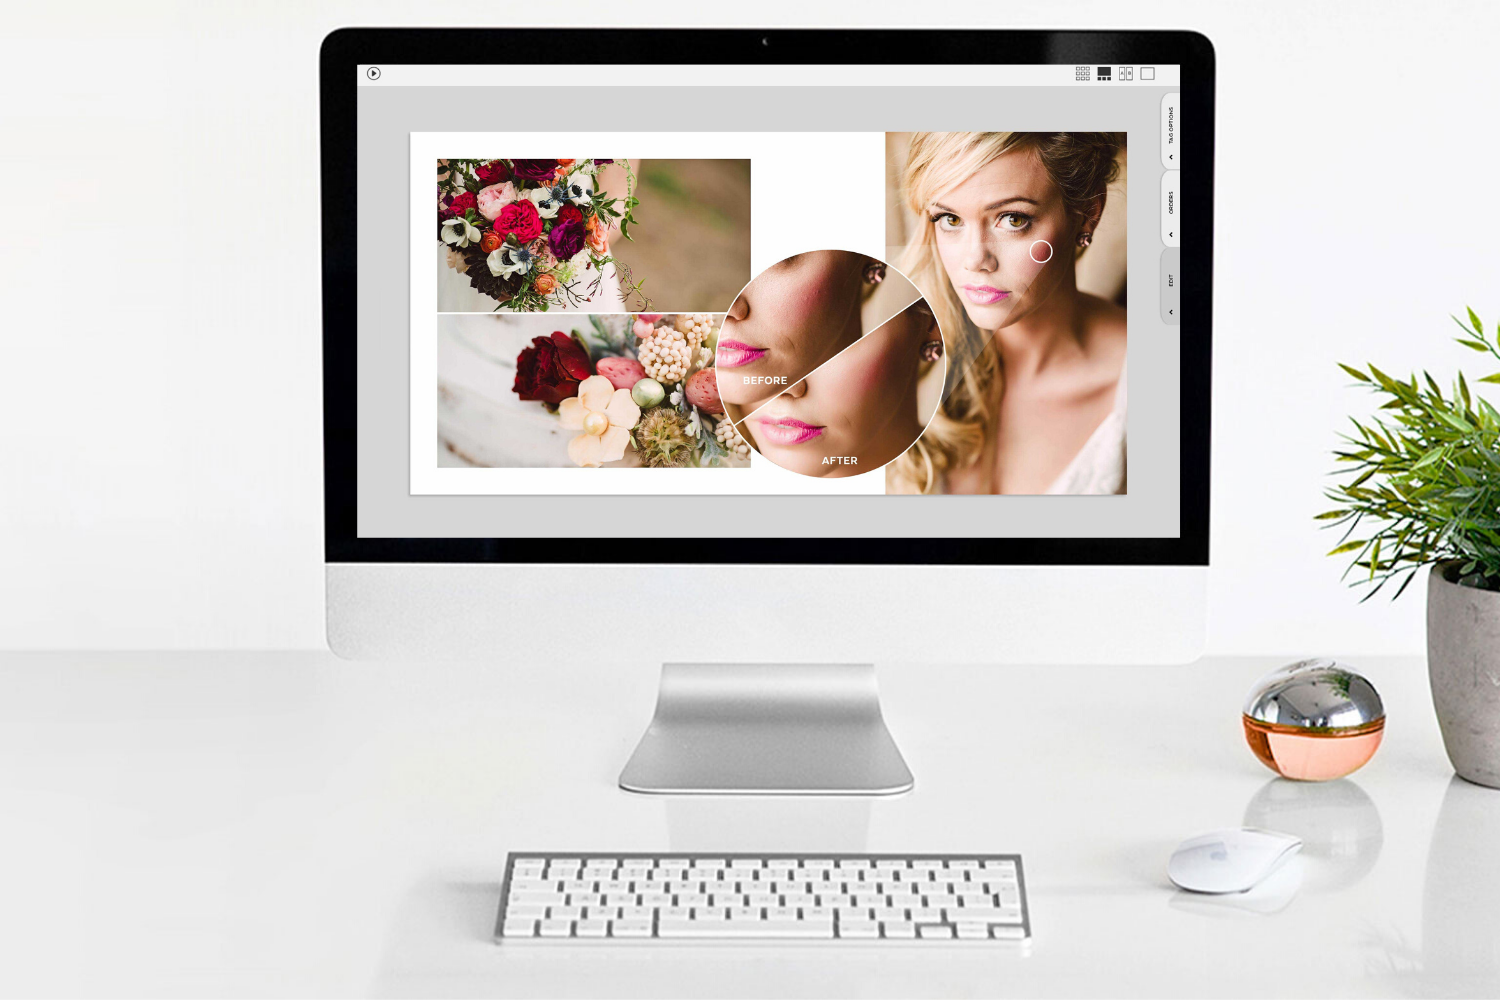
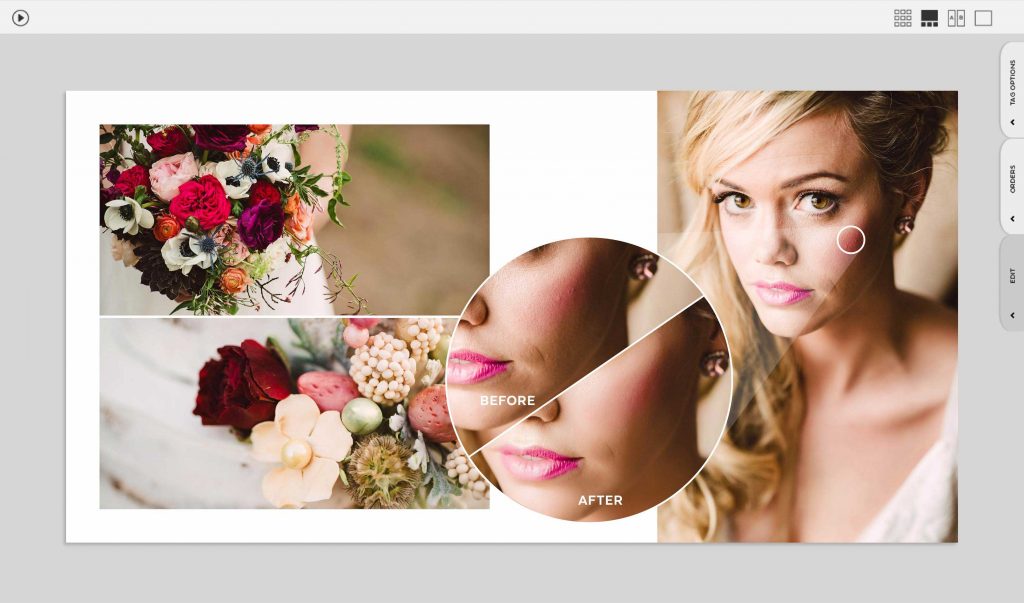
The one-click retouching built into Fundy Designer can help get faster approvals and sell bigger albums and wall art. You can use the retouching to make your design proofs look better, your IPS sessions run more smoothly and make your printed albums flawless.
Want to retouch an entire wedding or portrait session in under 5 minutes? In this blog post, we’ll show you how to make this summer season as stress-free as possible.
Licensing the Best
We chose to license Perfectly Clear and build it right into Fundy Designer. This way, our users can utilize their 100+ skin-smoothing patents to make retouching a breeze.
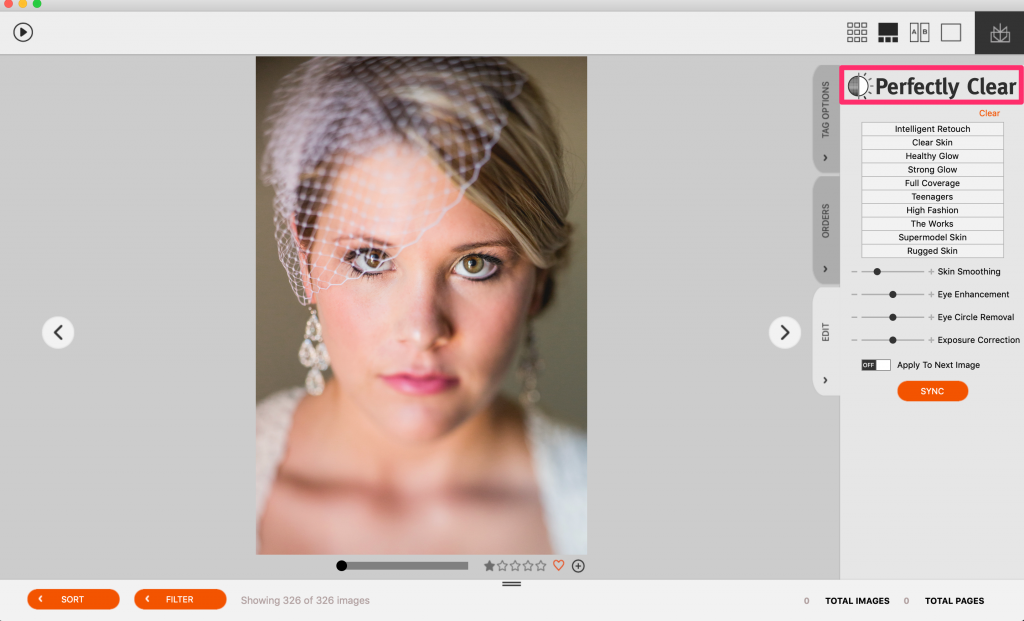
Perfectly Clear is not just a skin retouching tool. It also brightens eyes, removes “under-eye circles,” whitens teeth and even does some face slimming. It does all of this automatically and uses face detection to identify the age and gender of the people in the photo so it doesn’t overdo it.
How to Get Started
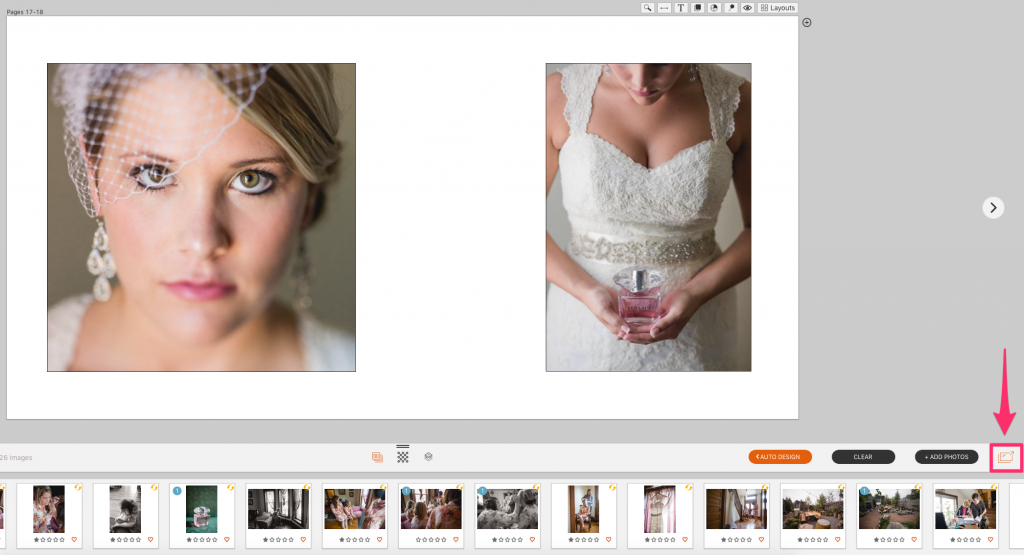
To get started, first enter the Image Browser by double-clicking on a thumbnail in your image well, or click the icon here to pop it open.
 © Style & Story
Image Browser is our “Edit” window where you can organize and tag photos, use the A/B view to choose album selects, build a client order, and so on. It’s also where our one-click skin retouching lives.
Once you open up the Image Browser, make sure you are in the Filmstrip view by clicking the appropriate icon here.
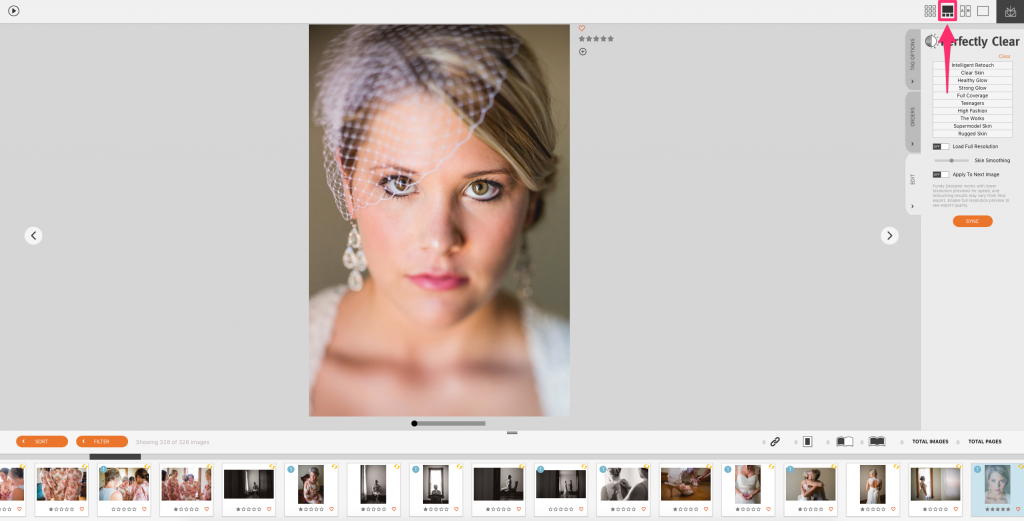
Now click the “Edit” tab and you’re ready to go.
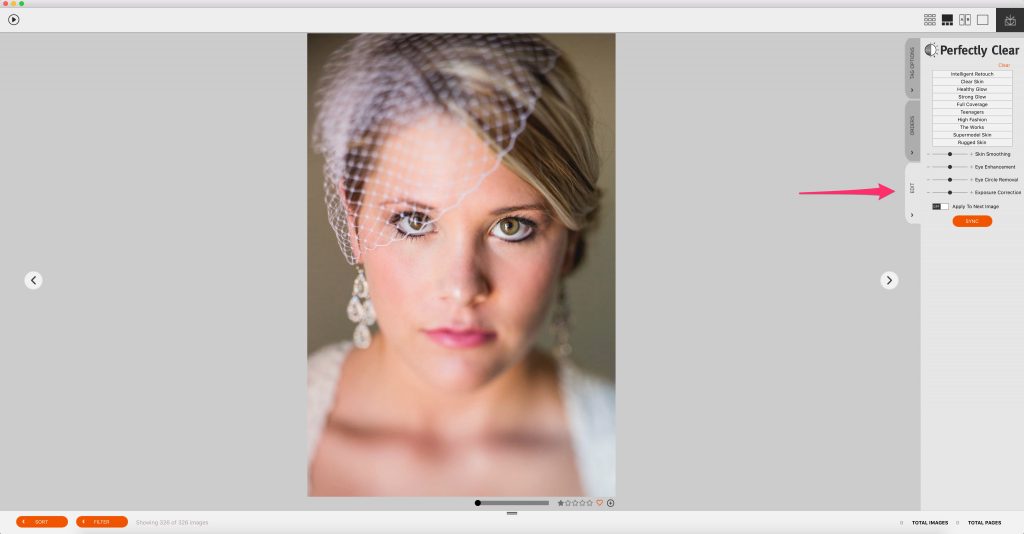
Choose Your Preset
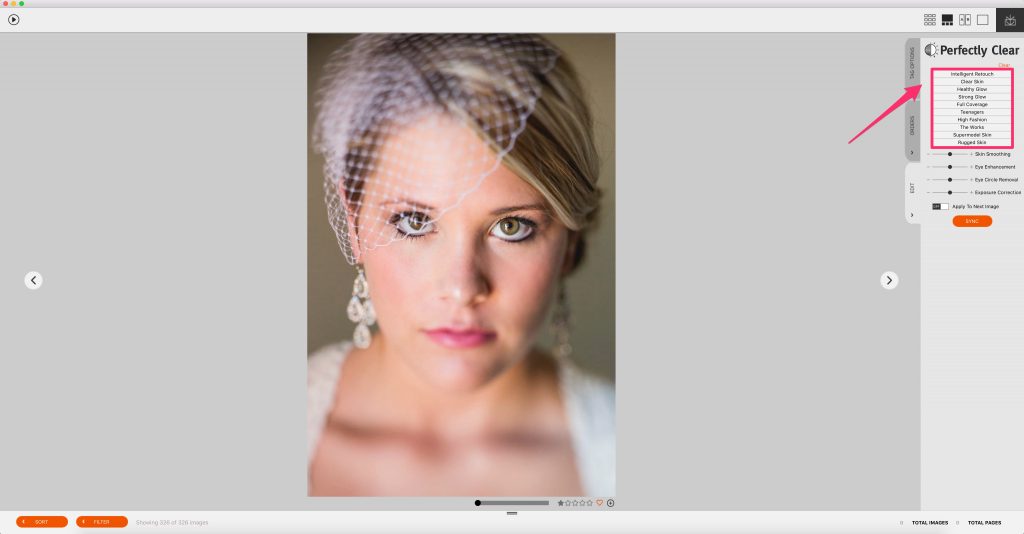
Next click on a preset that you like. Since we launched our one-click retouching, “Intelligent Retouch” and the “Full Coverage” have become the most popular starting points. Each of the presets offers something a little different. You can also adjust the intensity with the slider bar.
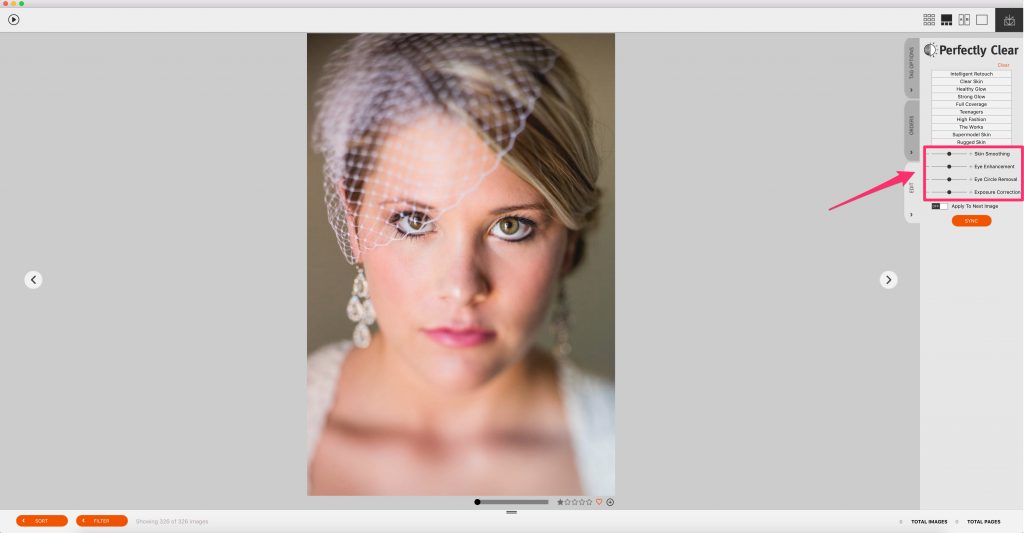
Make Finishing Touches
In Fundy Designer v10, you now have the ability to edit your photos even further by adjusting Exposure Correction. No more back-and-forth between Lightroom and Photoshop–take care of all your skin retouching in one place!
Batch Sync to Save Time
The next step is to select similar photos to the one you’ve adjusted to your taste. These will be the photos that you want to apply the same settings to. Many photographers are comfortable enough with the automation that they just select all of the photos by using the command+A (Mac) or control+A (Windows) to select all photos and click the Batch Sync button.
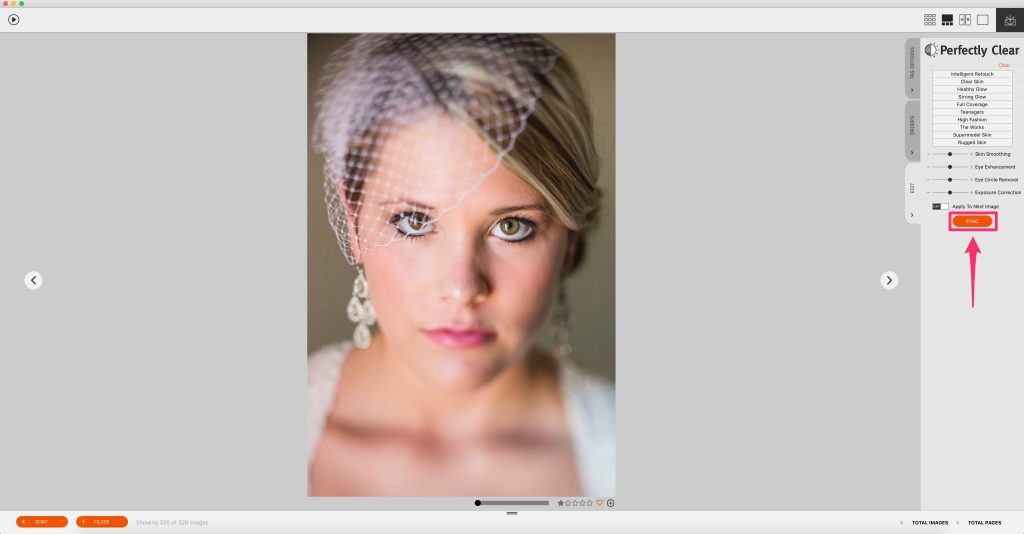
The button will turn gray and Fundy Designer will slow down while applying the settings to all photos. This may take a few moments if you’ve selected more than a hundred photos.
If you don’t want apply the same settings to all photos, you can do them in smaller batches as well.
More Time Savings with Selling & Ordering
The true time-saver is that once your photos are retouched to your liking in the Image Browser, those photos will appear retouched across all the modules. So you can easily present and sell albums, wall art, cards – and they will all be retouched upon export so they’re ready for ordering.

Retouched Digitals
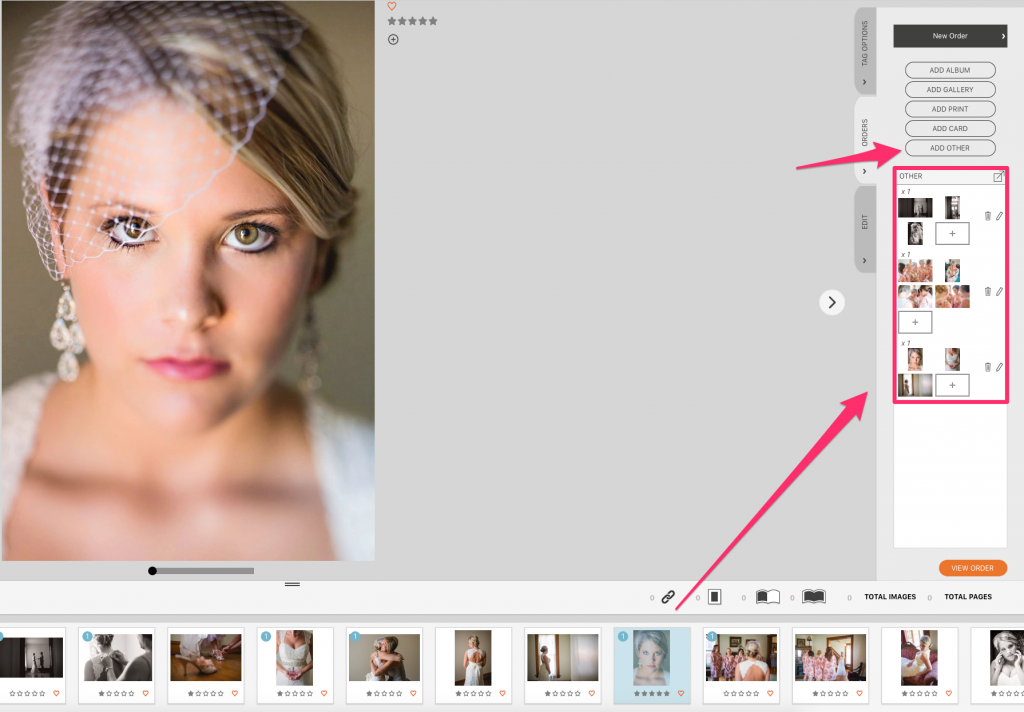
Some photographers will also offer retouched digitals to their clients. If this is the case, you can “Add Other” to your client order. Drag photos to be given as digitals into that “Other” category on the order. When you go to export, those digital files will also be retouched.
Custom Editing & Retouching
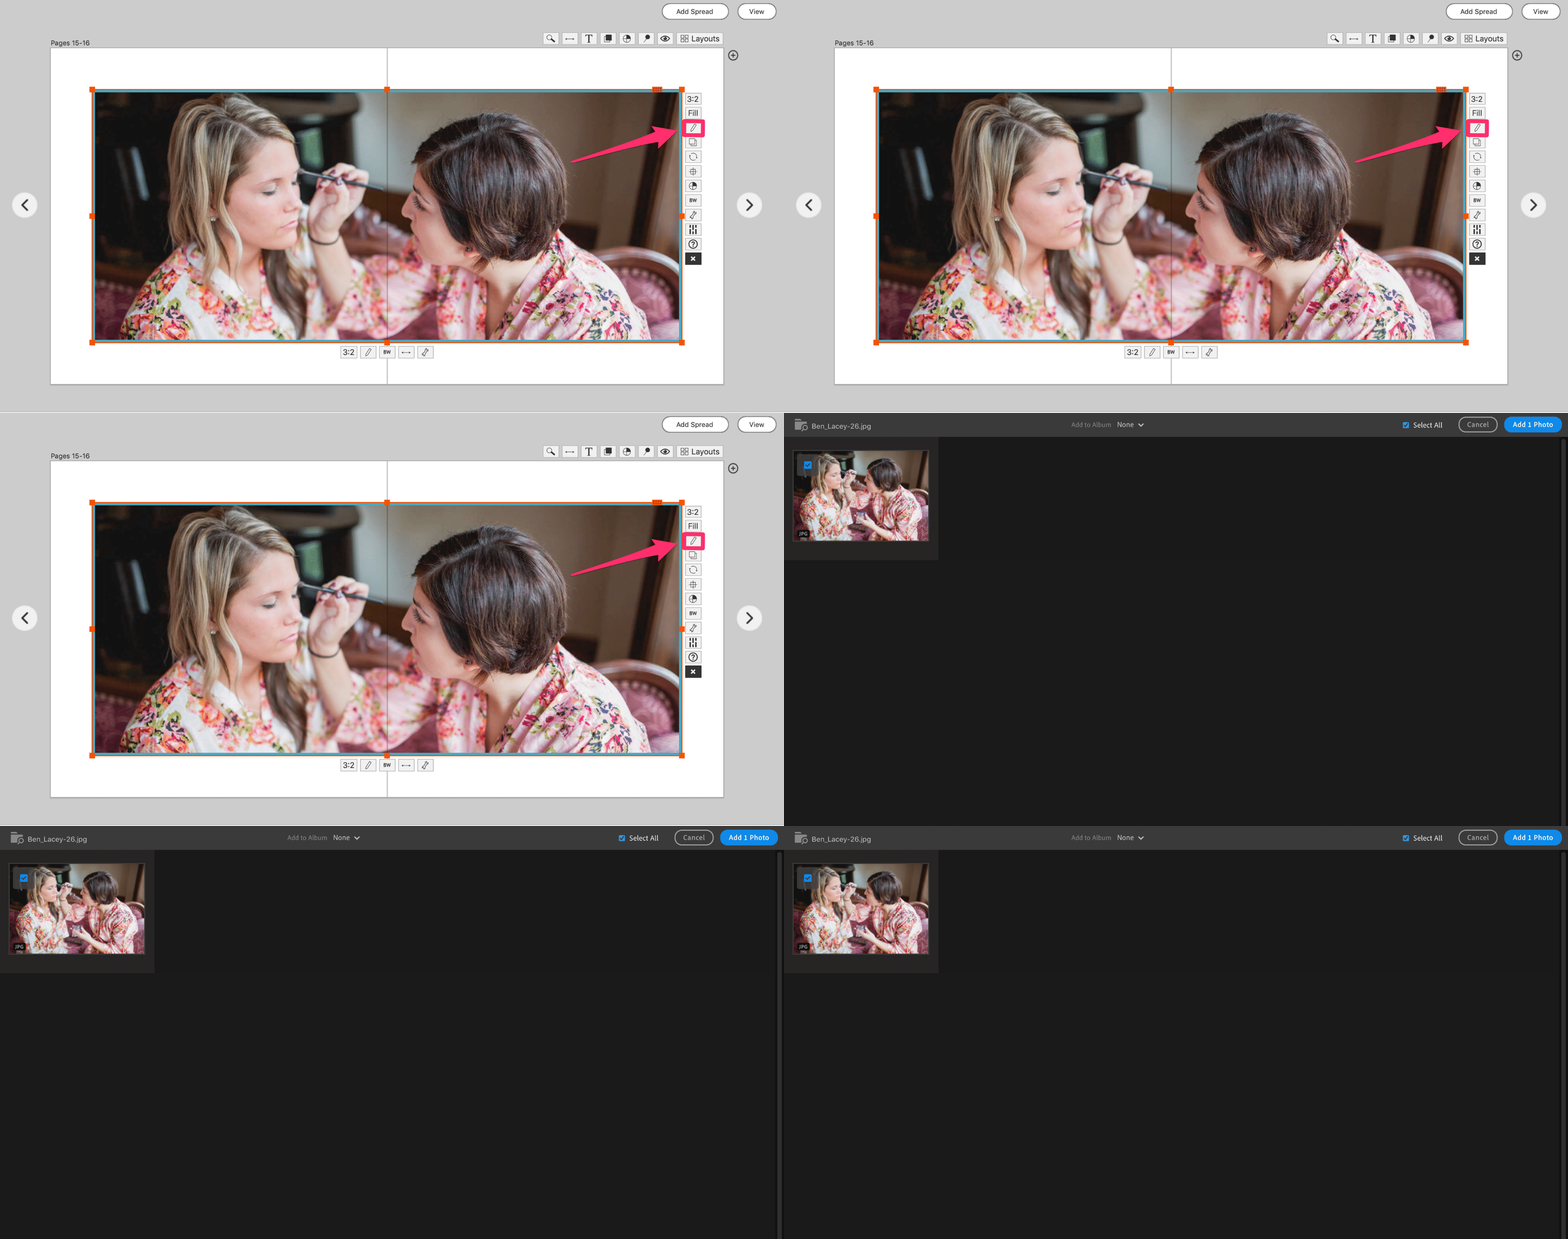
Some of our users may also offer selective retouching and editing of photos that clients choose for their printed products. If that’s the case, you can use our one-click skin retouching and tell your clients. “These photos I’m showing you now have been lightly retouched but I will go through and edit them each individually before ordering your album and wall art.” This way, they’re seeing retouched photos of themselves rather than originals, making the sale easier for you without you having to hand retouch 100 photos.
Pro Enhancements
One-click retouching is part of the valuable Pro Enhancements subscription. If you already use Design Proofer and the Design Library, now is time to start using One-Click Retouching.
If you don’t have Pro Enhancements enabled, click here and scroll down to “Add Pro Enhancements.”
Images © Style & Story unless otherwise noted.
