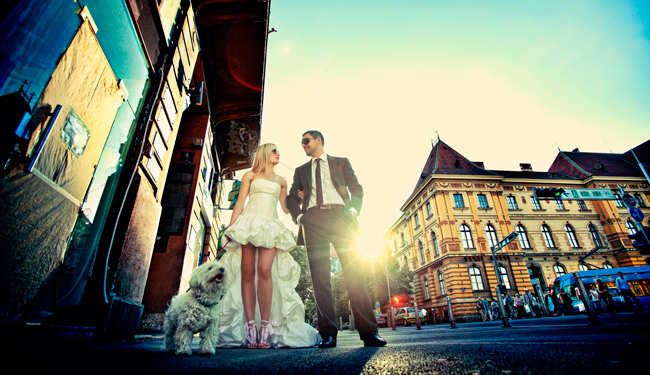
This image by Marko Dusak of Spinaker Graphics is nothing short of breathtaking–not only the photography, but also the editing. This is the first of this series–anatomy of an image. We take an image and show, not only how it was created in camera, but the entire editing process behind it.
Image © Spinaker Graphics
The Shoot
Location
It was shot in the center of Zagreb, the Capital of Croatia, in a summer afternoon.
Equipment
I used Canon 5 DMkII and EF 16-35 f2.8, f3.5 at 1/320, ISO 100. Since I had nice warm, afternoon sun from the back, my assistant at the right side, held a 120 cm Lastolite reflector to lighten them up.
Shooting
Marko was on the ground shooting up.
RAW Processing
Canon DPP
Photoshop
-Sharpen
-Partially darken some spots in the picture, like sky, sun, and parts of a buildings, street, and people at the back. This was accomplished by copying a background ( cmd+j ) and then changing the layer blending mode to multiply.
-Add a layer mask and with my wacom tablet pen, brush off parts that I want to be normally exposed.
-Next use Craig’s actions, Color Genie Warm
-Next use the Shoppe Designs nostalgia actions Cool Beans to color the photo.
-Finally use Topaz Adjust 5 on some parts of the photo to sharpen even more and bring in details
Saving Time with Batch Editor
Each of these steps can be put in Batch Editor as a mix and applied with one click. Give Batch Editor a try here or buy here. It’s a great time saver.


