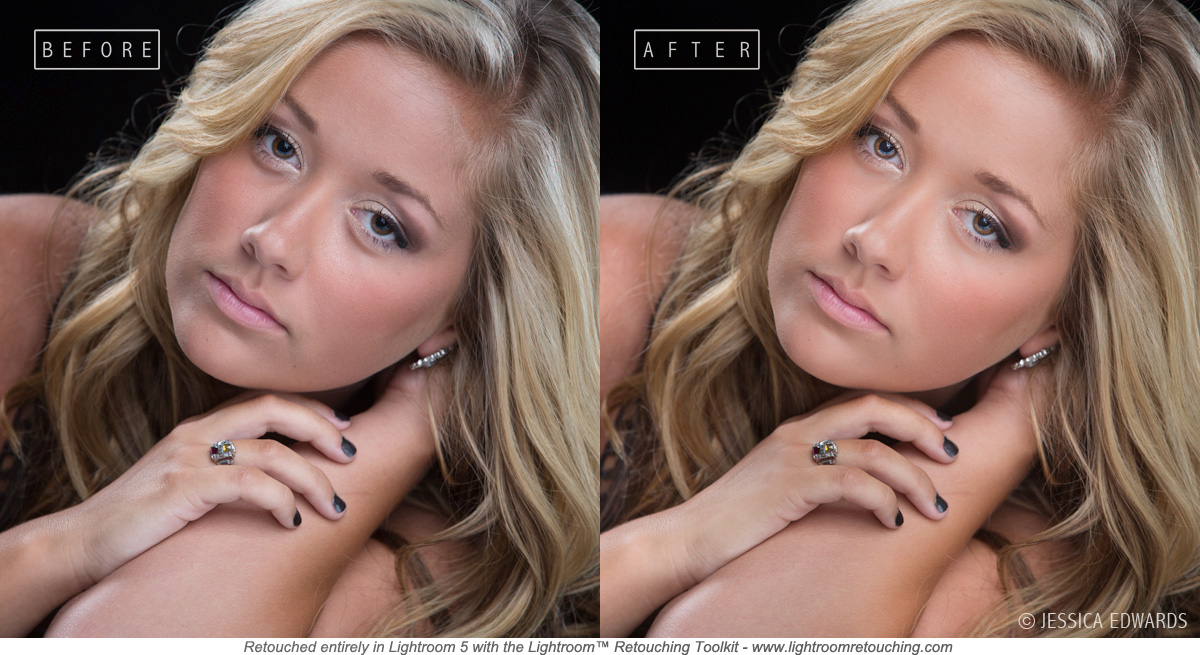
Brett Jarnagin is an award-winning wedding and portrait photographer who created the Lightroom™ Retouching Toolkit, which is a set of adjustment brushes that allow you to retouch skin, enhance eyes, balance your images, apply makeup and more. For this week’s Tip of the Week, Brett shares some of his favorite tricks for making Lightroom even more awesome.
Lightroom has become the staple of most photographers’ workflows around the world. I love the program but it drives me crazy to leave it to go into Photoshop. It takes too much time jumping back and forth. The three things I went into Photoshop for the most?
1) Retouching
2) Recreating Sun Flare
3) Applying a Tilt-Shift effect
I am kind of a crazy person (aren’t all artists?) and I have an unrelenting desire to figure things out. So, I decided to crack the code on all three. I found that the sun flare and tilt-shift effects could be recreated by using the gradient tool in Lightroom and it looks great! (Check out the video at the end of this post for a full tutorial on that topic).
Retouching in Lightroom was an entirely different issue. Sure, Lightroom 5 has a brush for skin retouching, but it just blurs the skin and doesn’t look anything near natural. So, I decided to make a brush that does it…then I made one for the eyes…then the teeth, the lips, make-up, etc. Before I knew it, I had 48 adjustment brushes that have completely changed my workflow and the workflow of thousands of photographers in over 30 countries around the world. We no longer have to go into Photoshop to edit!
Check out the video here:
First, a bonus tip!
Adjusting Camera Profile of RAW Images
Have you ever taken a RAW image that looks great on the back of your camera and then looks different on the computer? The colors aren’t as vibrant, the contrast is different…what the heck is going on?
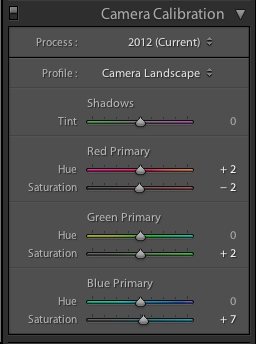
What many photographers don’t realize is that Lightroom doesn’t automatically apply your camera profile settings. It reconverts them back to “Adobe Standard,” which I have rarely found to be the best option. To make adjustments to the camera profile of your RAW images, head to your Develop Module and scroll all the way to the bottom of the adjustments panel until you see “Camera Calibration” at the bottom. Click on the “Profile” dropdown menu and you will find more options. Run through them all on several different styles of images and take notes of which ones you like the best. If you don’t have options in that dropdown menu, you are most likely working with a JPEG file and not a RAW file.
If you are a JPEG shooter, whatever your camera profile is set to in your camera will be embedded in the image data and can’t be changed. So, either start shooting RAW or take the time to find out what settings look best on your image and change them in your camera menu. The best route to doing this is to actually go out and shoot RAW, run through all these steps to find your favorite settings, match them in camera, and then switch back over to JPEG.
You can also make small adjustments to the hue and saturation to the reds. I like to lower the red saturation slightly just to remove some of it from the skin if it is present, and also slide the hue over a little to the right to make it a little more orange than red.
These settings and options will be different for Canon and Nikon shooters. I use Canon so my examples will be of that. I encourage all to experiment and find what works for your style.
Applying Your Favorite Profile to All RAW Images
1) Find the camera profile and color settings that you like most consistently on all different types of your photographs. It is worth the time investment to make sure you are getting consistent results.
(If you find that you like multiple camera profiles, follow through until the last step with your favorite and repeat step two only with the rest. Then you can quickly change the camera profile with a preset of your own just in case the one that automatically applies doesn’t fit your style or look right.)
2) Next, click the + sign in the Preset box on the left hand side, under your image preview.

3) That will bring you to the New Develop Preset dialogue box. Name your preset at the top and select which preset folder you want it to go in. This is where you will find it in your presets menu later. Select only the Process Version and Calibration as Shown.
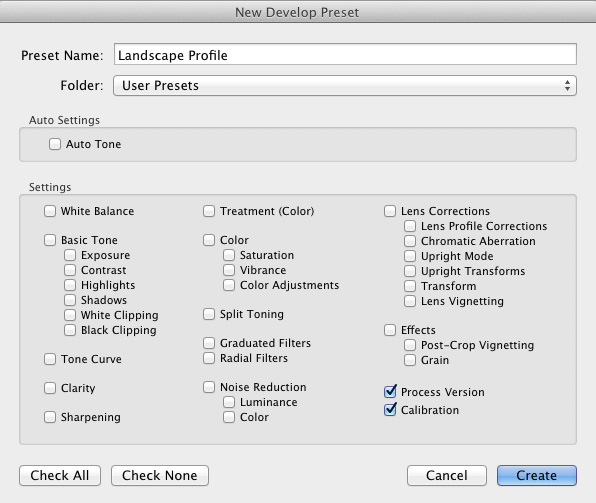
Bonus Tip: If you consistently change any one of these settings you can make those adjustments in step two as well. Then just check their boxes at this screen and they will also apply on import. I like to raise the Clarity to +15 and the Vibrance to +10 by default. Find what works for you!
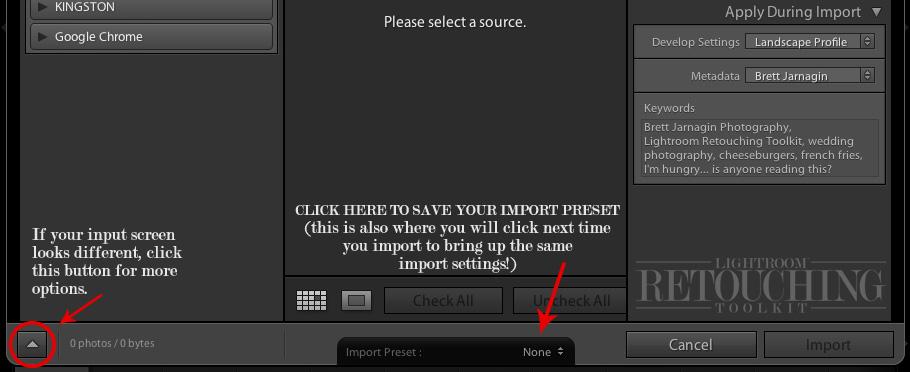
4) Now that you have created your own preset, you can use it the next time you upload your images. When you are at the import screen, click the little dropdown arrow to see more options in the bottom left. Click “Develop Settings” and select the preset that you created. I would also recommend setting up your metadata and keywords because they will help with SEO. Metadata is unlikely to ever change for most photographers. Your “keywords” should fit the subject each time you import.
5) Click “Import Preset” at the bottom of the import screen and select “Save Current Settings as New Preset.”
6) You are now ready to import your photos!
7) The next time you import images, simply click “Import Preset” at the bottom of your screen, select the one you created, and all of your settings will automatically apply on import.
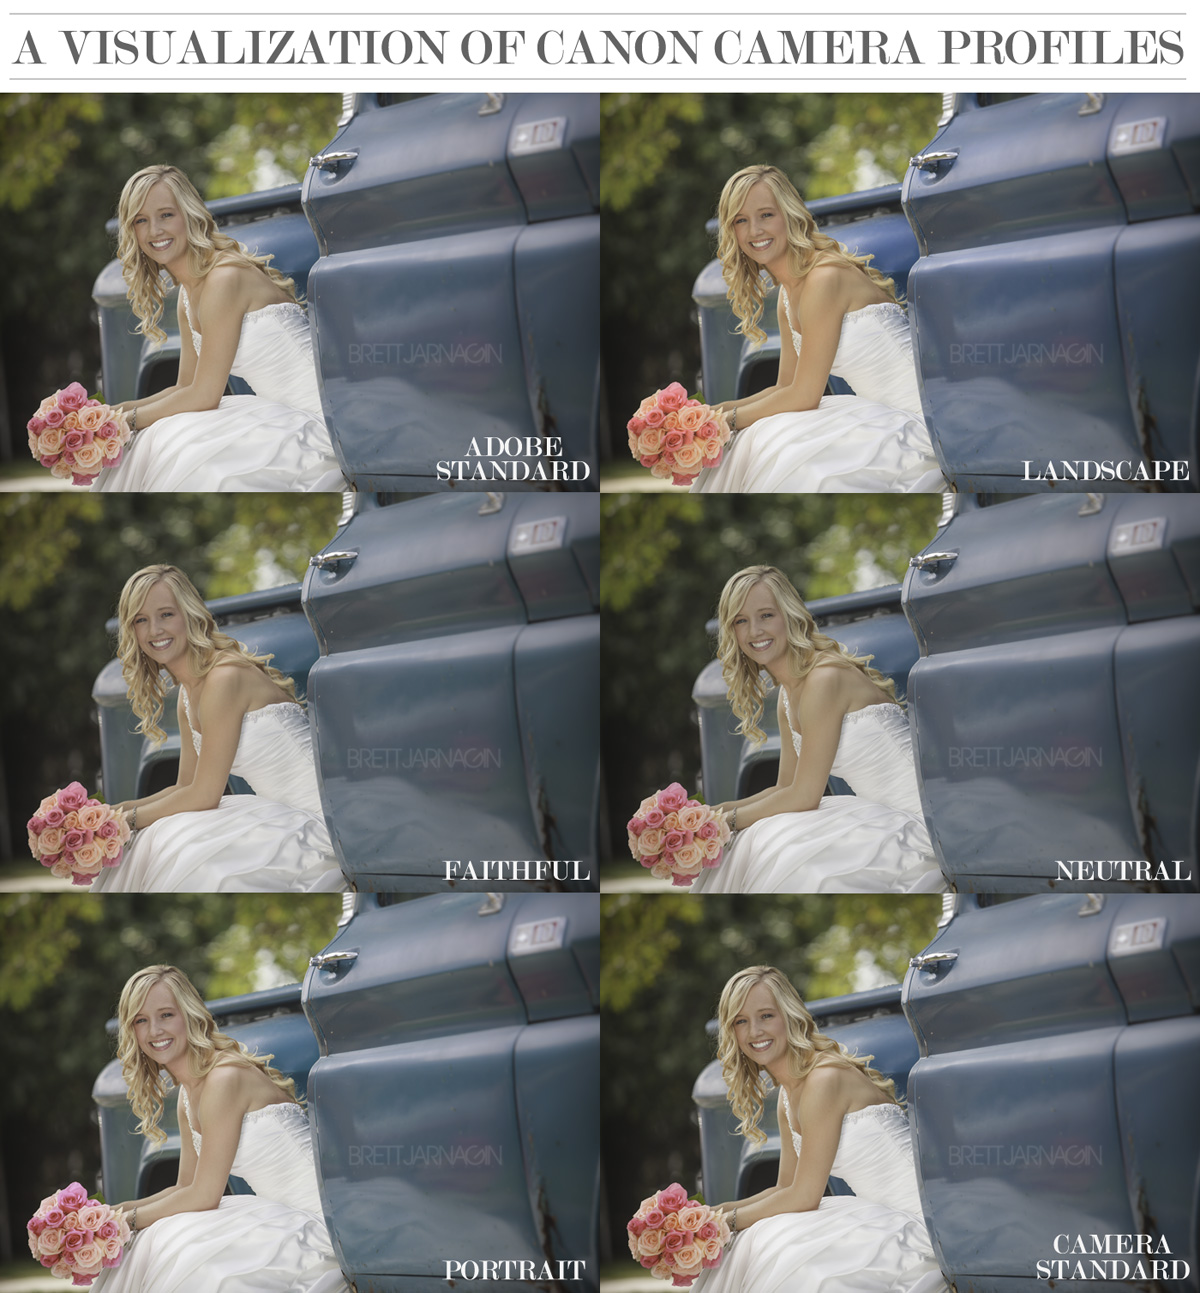
Thanks for reading and watching! As another bonus, here is a quick visualization of Canon Camera Profiles:
Note: Brett Jarnagin has generously extended his special pricing of $69 on the Lightroom Retouching Toolkit until Friday, November 21, 2014. To take advantage of the offer, click here and enter 20FUNDY at checkout. This post also previously featured a giveaway of LRT. This offer expired on November 14, 2014. Thank you to everyone who participated.


