You may not pay much attention to the thumbnail well in your project, but there are some extremely powerful features lying just to the left of your designs. Everything from dragging new images into your project, to updating and editing images. Let’s take a look at these powerful features. We’re not only committed to making a powerful design program, but also committed to being an integral part of your workflow.
Dropping Images In
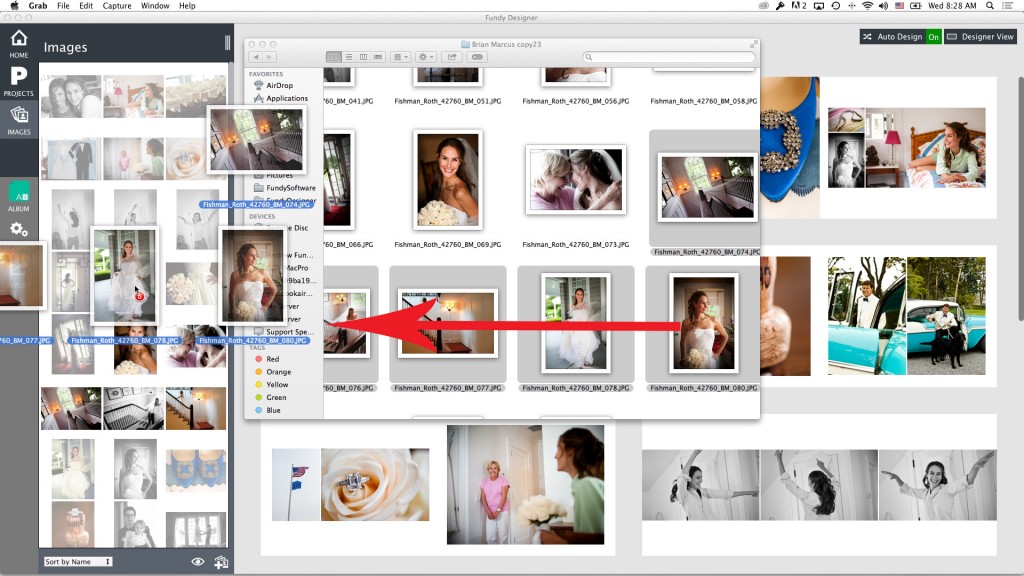
While this screenshot is done on a Mac, it works exactly the same on a PC. If you want to drop in just a few extra images into your project, just drag them onto the thumbnails. You can do this from a desktop window, from Bridge, from PhotoMechanic, etc. Fundy Designer will import them in and add them to your project. You can add just one image or a whole bunch. **you can also use the little image+ icon to add images.

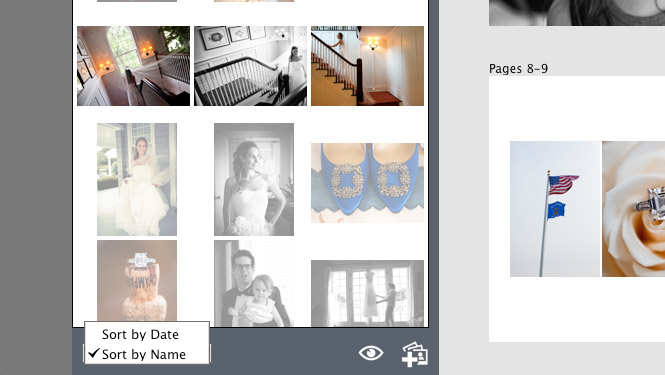
Sorting Your Images
You have the option of sorting your images by date. This function simply pulls in the metadata from your camera and sorts them by date taken. Now, if you forget to sync your camera clocks, simply re-order your images at the edit stage (Lightroom or Aperture recommended) and run a batch rename, renaming your files in order. The most common method would be “Johnson Wedding 2014-06 001.jpg, etc.” Then when you choose Sort by Name all of your files will be in order.
Toggling The Thumbnail View
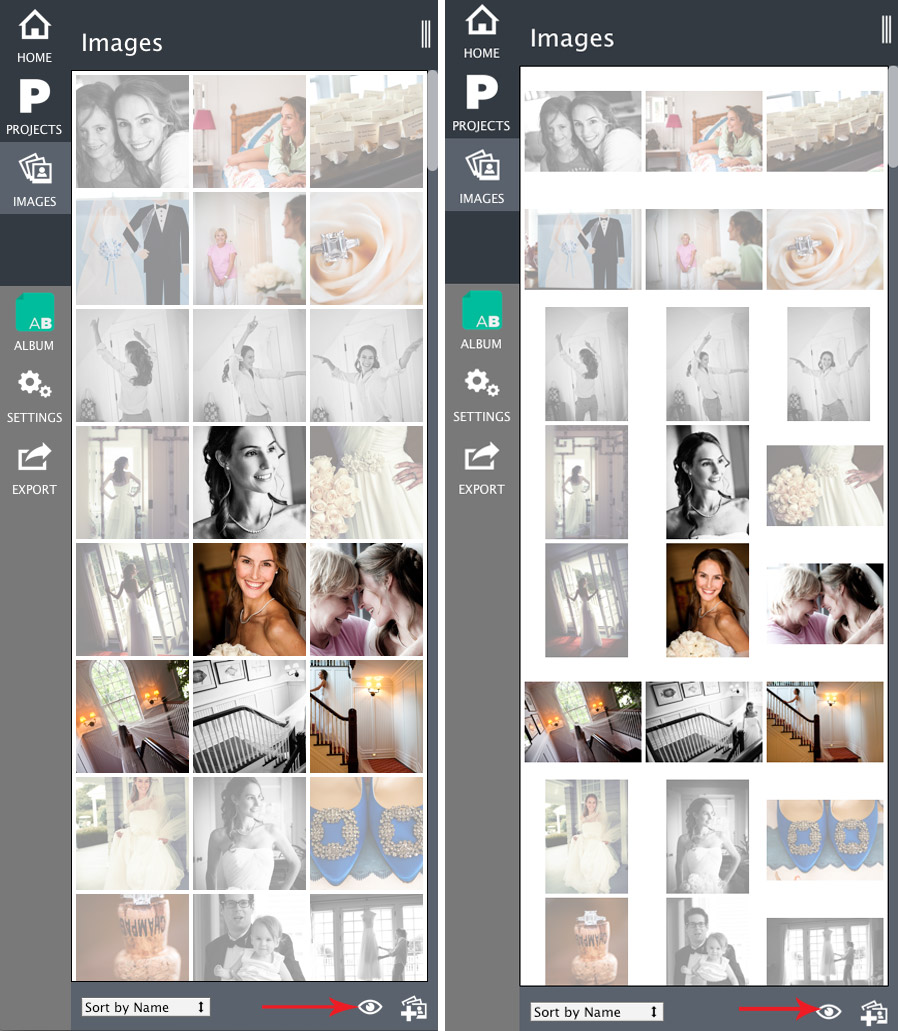
By default we show square thumbnails (mostly because we think it looks cool). But you can also view the full image by clicking on the little “eye” icon.
Thumbnail Feedback and Right+Click Options
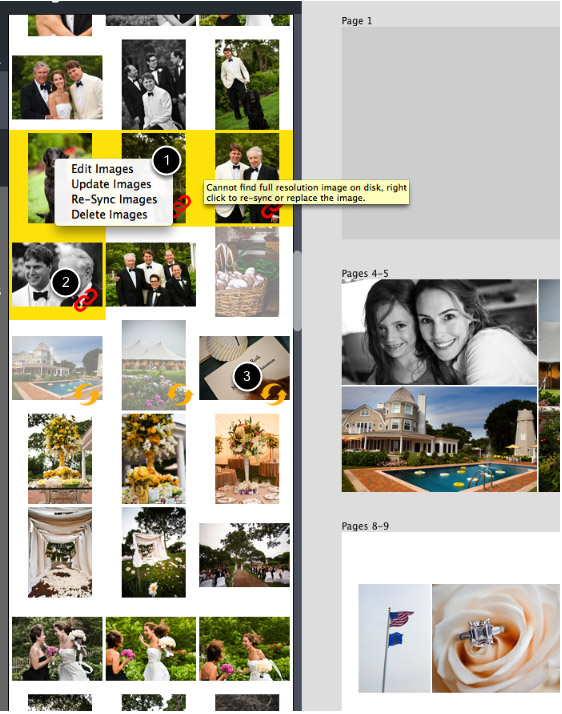
We have some fairly sophisticated feedback in the thumbnail well. Two icons in particular are very important. The red chain link (#2) means that the original image has been moved and Fundy Designer does not know where it is. Simply right click or control click on the thumbnail and choose “Re-Sync Images.” Fundy Designer will ask you to choose a new folder. Then Fundy Designer will do all the hard work of finding the new images for you. The second icon that is important is the two yellow arrows icon (#3). This icon signifies that the images have been edited outside of Fundy Designer and the thumbnails and proxy images are out of date (i.e., the images might not look like the new edit). You can right click and choose “Update Images.” This will update your thumbnail and proxy images.
Finally, on right+click you have two more options (#1). You have “Edit Images.” This will open any number of images in your external image editor – Photoshop, Photoshop Elements, Alien Skin Exposure, etc. And “Delete Images” will remove the images from your project. On Delete, don’t worry, we have a fail safe. If the images are used in an album or another project, we won’t let you delete the images.
All images © Brian Marcus at Fred Marcus Studios.
Conclusion
We hope that this little tutorial helps you get the most out of Fundy Designer. If you don’t have the trial yet, download here.


