This week’s tip is by acclaimed photographer, Patrick Shipstad, who is based out of Los Angeles. Read more about Patrick at the end of this week’s post.
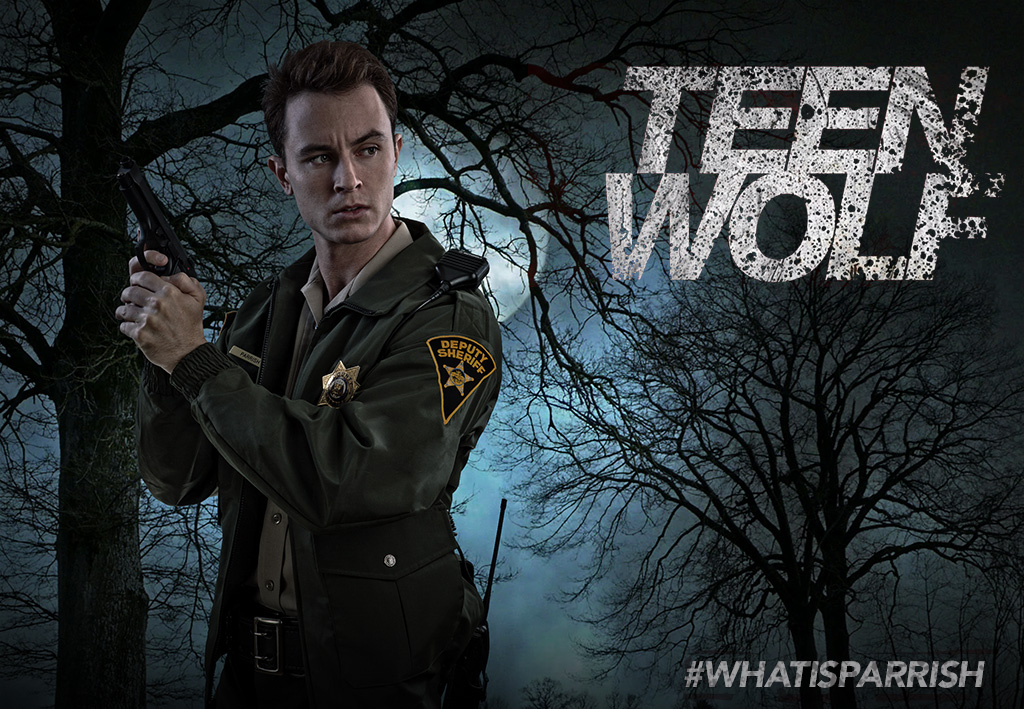
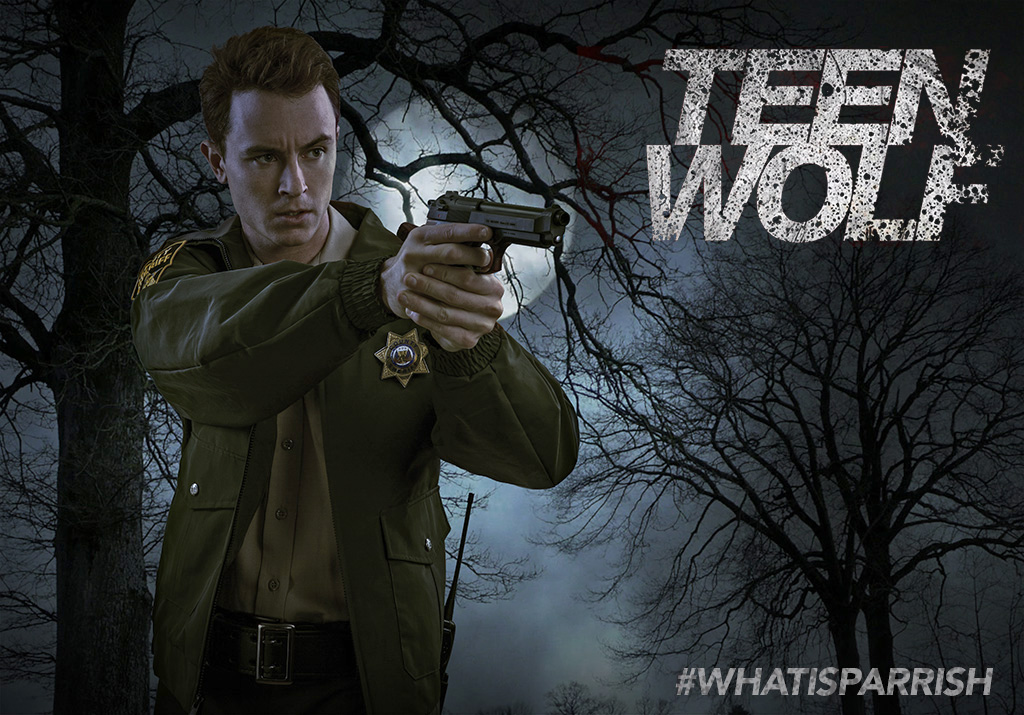
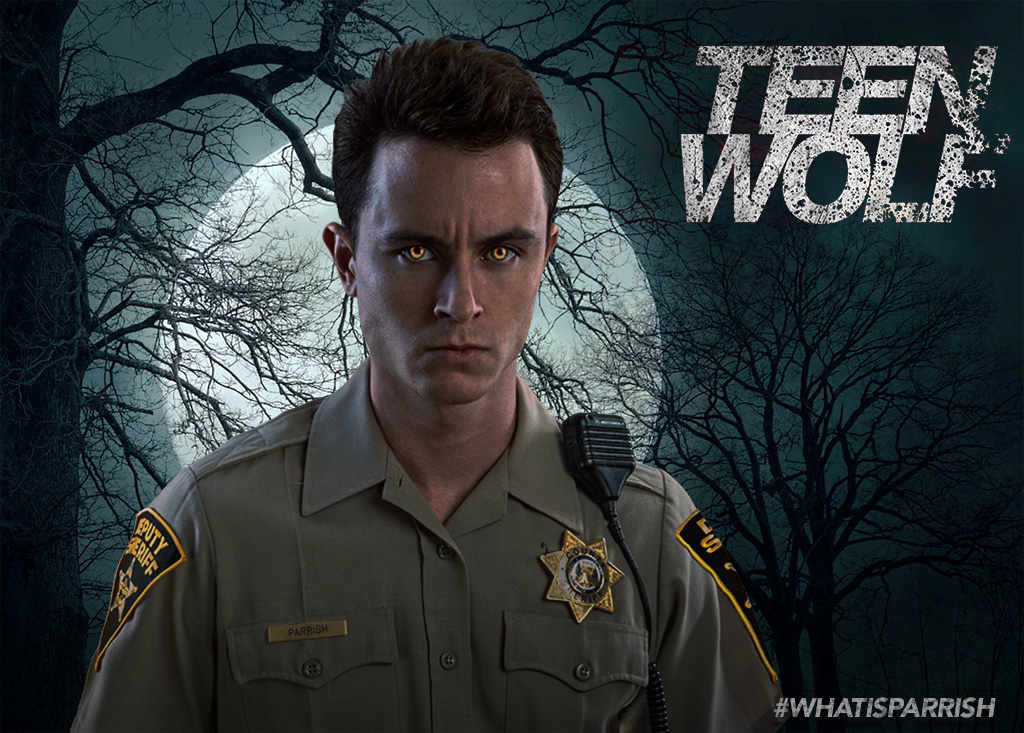
In the fourth season of MTV’s hit show Teen Wolf, Ryan Kelley plays Deputy Jordan Parrish. After walking away from being set on fire in one episode, and his eyes glowing in another, it’s obvious that Deputy Parrish is something more than a mere human. The Teen Wolf fan base is extremely active on social media and Ryan and his publicity team thought it would be a great idea to play on the fans’ enthusiastic speculation of “What is Parrish?”
I’ve photographed Ryan a couple times and we always get awesome shots together, so I was excited to do this!
The plan was to produce a few shots that looked gritty and cinematic, and a shot featuring his new glowing eyes. I’ve never photographed green screen nor had I done a dramatic composite before, so this was going to fun, but a little scary in a trial-by-fire kind of way. Luckily I’m an admitted CreativeLive addict and it just so happened that Aaron Nace from Phlearn was doing a class on “Compositing Essentials Techniques” the week before we were to shoot. Talk about perfect timing! I purchased the course and learned how to do this right. Money very well spent. Aaron showed some very cool techniques in Photoshop to quickly knock my model out of the background without plug-ins.
I decided to shoot on a blue screen instead of green because the sheriff uniform has a dark green jacket. I needed to pick a color that wouldn’t be remotely close to anything he was wearing, so I went with a sky blue. It was the perfect choice. We looked online for some dark, nighttime backgrounds and the ones we liked best on Shutterstock were not stills but videos. They asked if I could pull a still from the videos and I said of course. That got me thinking… a moving background with a still. Why don’t I just do additional versions of these images with the moving backgrounds?! As soon as I said it, I was thinking, “Great, I just got myself into double the work now,” but I’m glad because it turned out to be something unexpected and different. Always over-deliver.
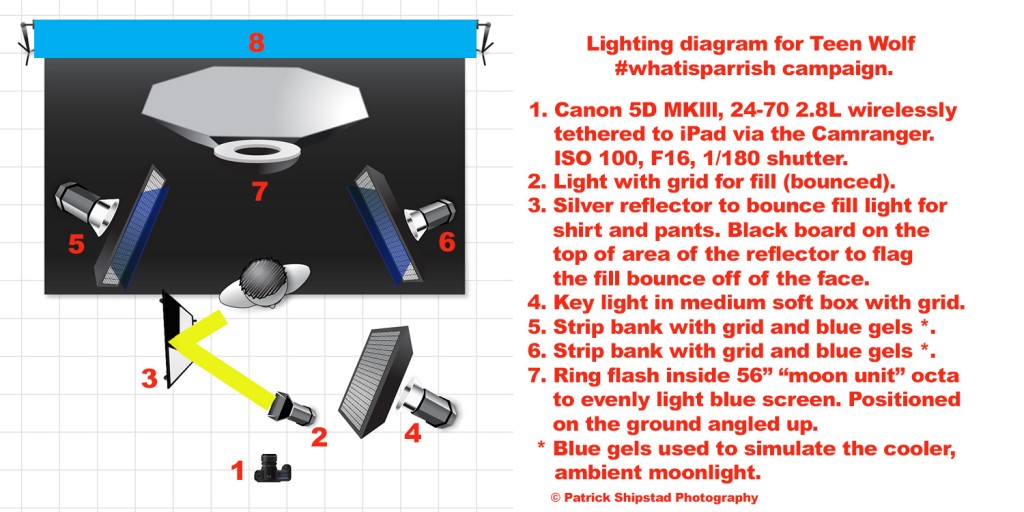
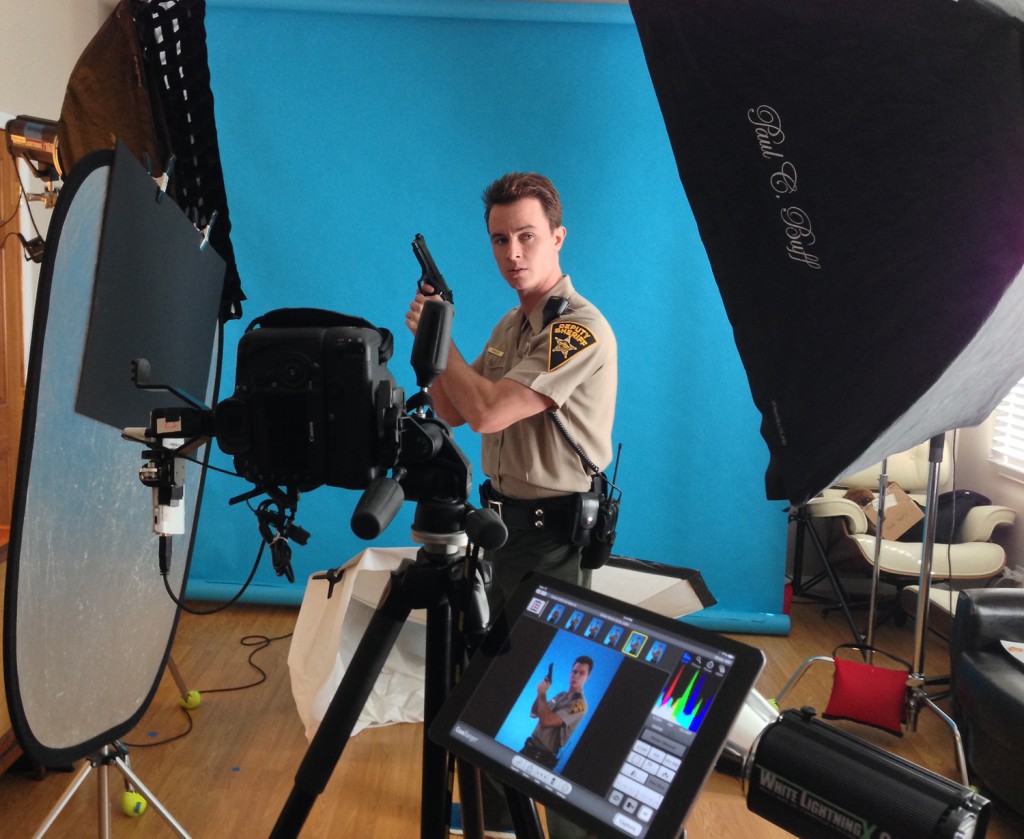
OK, let’s talk about the lighting. Because our backgrounds had moonlight as their ambient light source, I needed to incorporate that cool light temperature and direction of light onto Ryan. The moon was backlighting him, so I used rim lights and I wanted some moody front lighting as well.
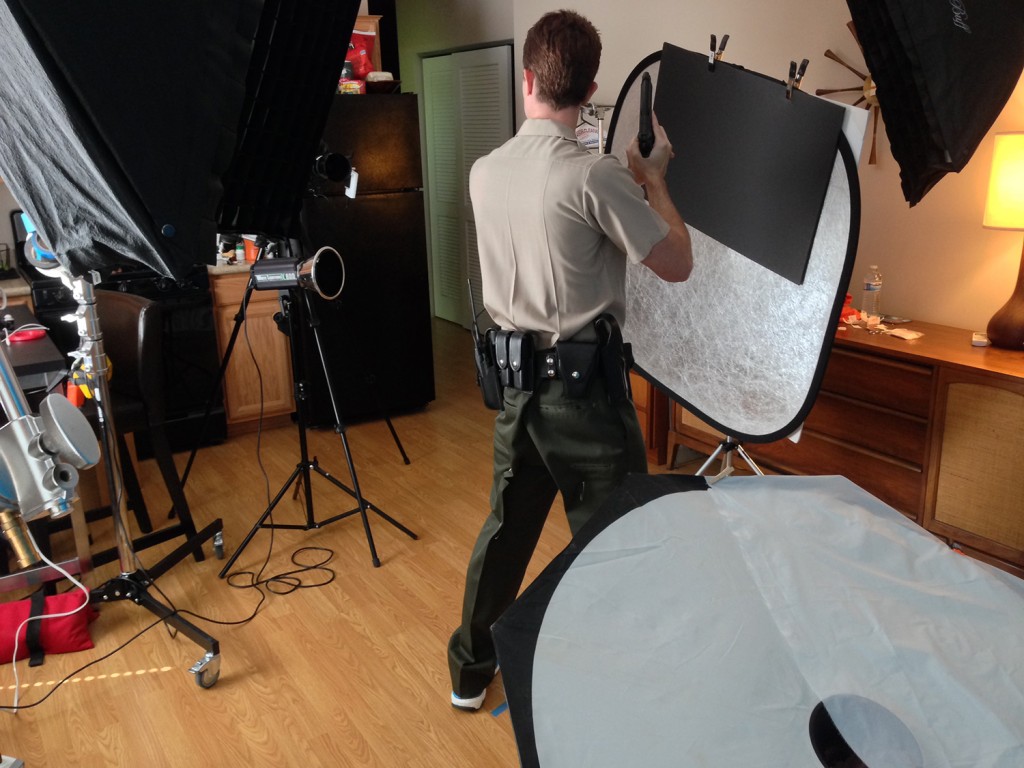
This wound up being a five light set-up. I used gridded strip banks on each side of Ryan to place the light precisely on the sides of his face and added blue gels inside to cool that light down to something that resembled moonlight.
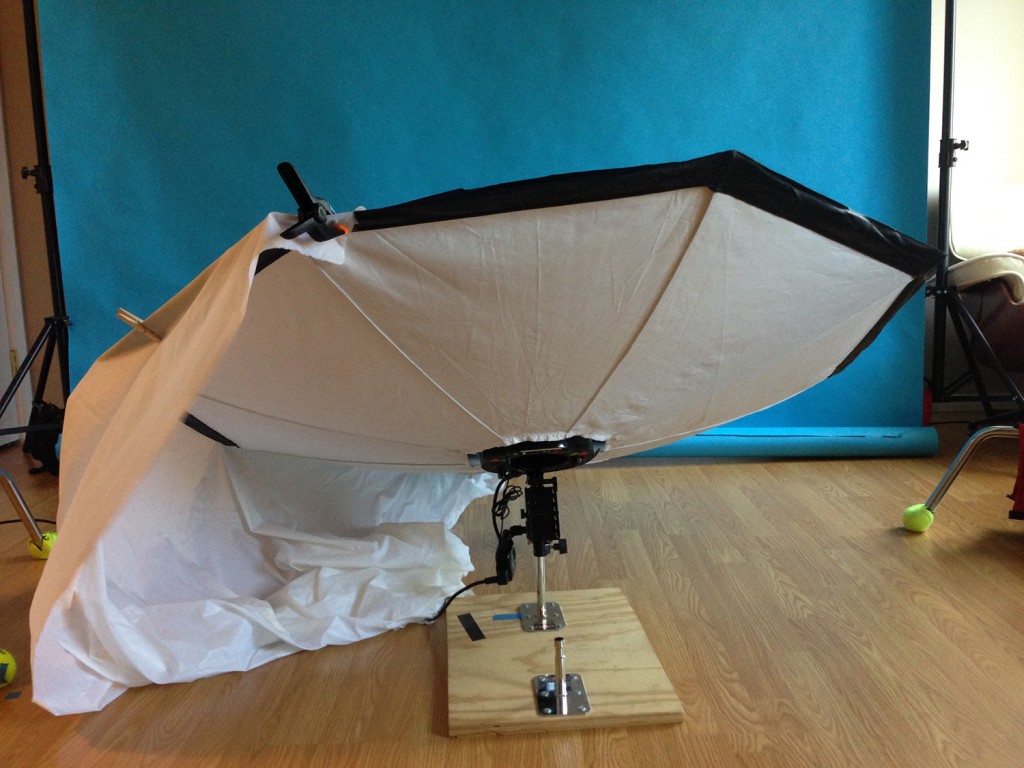
I used an Alien Bee ABR-800 ring flash inside a 56″ Moon Unit (Paul C. Buff’s ultra thin octabox) to throw an even light on the blue background. Because of limited space, I had to get creative and put it on a pancake (a board with a low profile stem on it for positioning lights from the ground) and tilt it up. That way I could center the background light behind Ryan to cover as much of the background as possible. I then used a gridded medium soft box positioned camera right, to rake light across his face and create some key light drama. The final light was gridded and bounced into a reflector to give a soft fill on the jacket and pants. FYI, all lights other than the ABR-800 were White Lightening X-1600s.
I shot with a Canon 5D Mark III and a 24-70 f/2.8L lens at 70mm (ISO 100, 1/160th @ f/16) that was wirelessly tethered to my iPad via the Camranger. I love that Camranger. The reason I used f/16 is because I knew he’d have a gun extended more than a couple feet in front of his face and at 70mm I wanted to keep the gun reasonably in focus as well as his face.
Based on the backgrounds we selected, I had a pretty good idea of the angle I wanted to shoot, which was a tiny bit lower than Ryan’s head level to give him a little larger than life feeling.
After shooting all the poses it was time to start compositing. I scrubbed through the HD background clips I purchased from Shutterstock and exported the still frames I wanted to use. After masking out Ryan from the blue screen, I positioned him on a layer against the background and began the color grading to match him into the background.
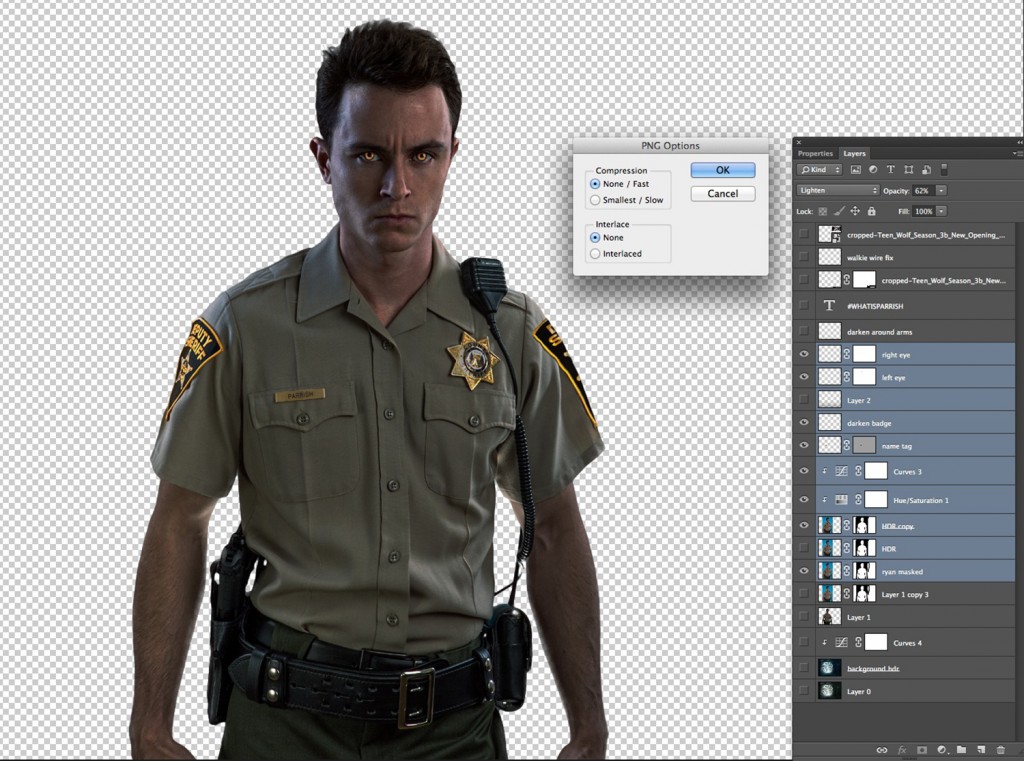
The color grading was done with a curves adjustment layer in Photoshop. Bringing out the blue hues in the shadows using the blue channel and pulling down the red highlights using the red channel. Then I added a hue/saturation adjustment layer and brought down the saturation a bit. The final touch was adding another layer of grit, so I duplicated the layer with Ryan and went into the OnOne Perfect Effects 8 (free) and used the HDR look “Exaggerated Edges n’ Tone.”
I did a little tweaking to the preset (seasoned to taste) and exported that HDR layer. I lowered the opacity to 20 percent as I didn’t want to overdo the HDR effect. I then added the Teen Wolf text and #whatisparrish text treatments and was pretty much finished with the stills. Of course, I did several versions with different poses and one with the glowing eyes.
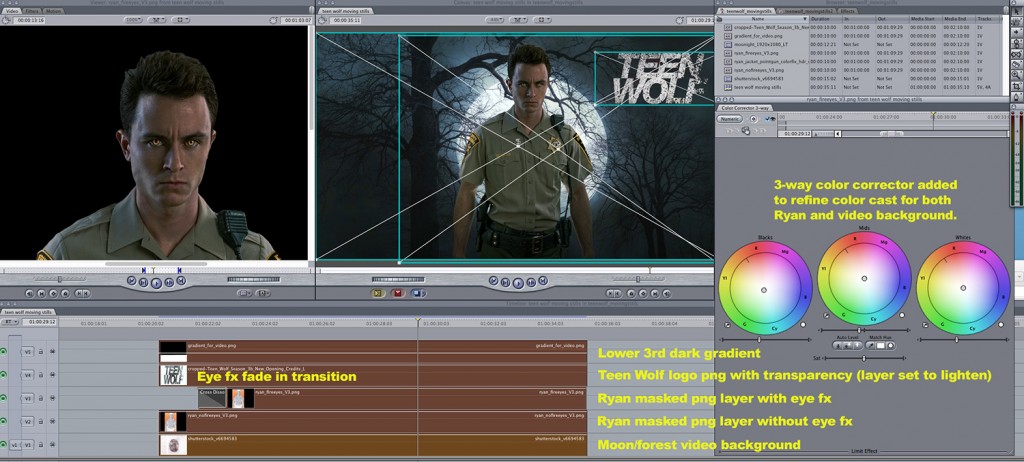
Thinking forward to the moving portrait versions, I knew I’d need to have the composited treatment for all of Ryan’s shots (the color toning, saturation, HDR, etc.) ready to use as a masked layer to bring into Final Cut. So in Photoshop, I disabled the text and background layers, leaving me with a masked-out shot of Ryan with all the color grading, but no text or forest background. Then I exported (Save for Web) as a PNG-24 with transparency, also embedding the color profile. That left me with a clean cutout of him ready to drop into my Final Cut timeline.
I created a custom Final Cut project file using the Apple ProRes codec at the native 1920×1080, 30fps of the video clips from Shutterstock. I dropped the video backgrounds on one layer and Ryan’s transparent PNG on another layer and presto…I now have a static subject and a moving background with the same look as I produced for the still.
I created a dark gradient for the lower part of the screen to bring his torso a little more into the shadows, and added the Teen Wolf text, which was also a PNG with transparency and set the layer blending mode to lighten. Then to add a little more movement to the clip, I key-framed Ryan slowly moving to the right and the text to the left over the 15-second clip.
For the glowing eyes clip, I simply exported a version of Ryan with the glowing eyes out of Photoshop, and one version without, and slowly crossfaded them in the video timeline to bring in the effect. I kept the clip to 15 seconds because that’s the video time limit for Instagram where we knew these clips would be used. The final videos were cropped, resized and exported to an mp4 through Sorenson Media’s Squeeze. Also, to keep the crop of the video I wanted, I exported the clips with black letter boxing on the top and bottom to create a square video, which Instagram uses.
The campaign was a big success with the Teen Wolf fans liking and reposting the stills and clips all over their own blogs and fan sites. So, after all this, we still don’t know the answer to #whatisparrish. I guess we’ll have to wait until Season 5 to find out!
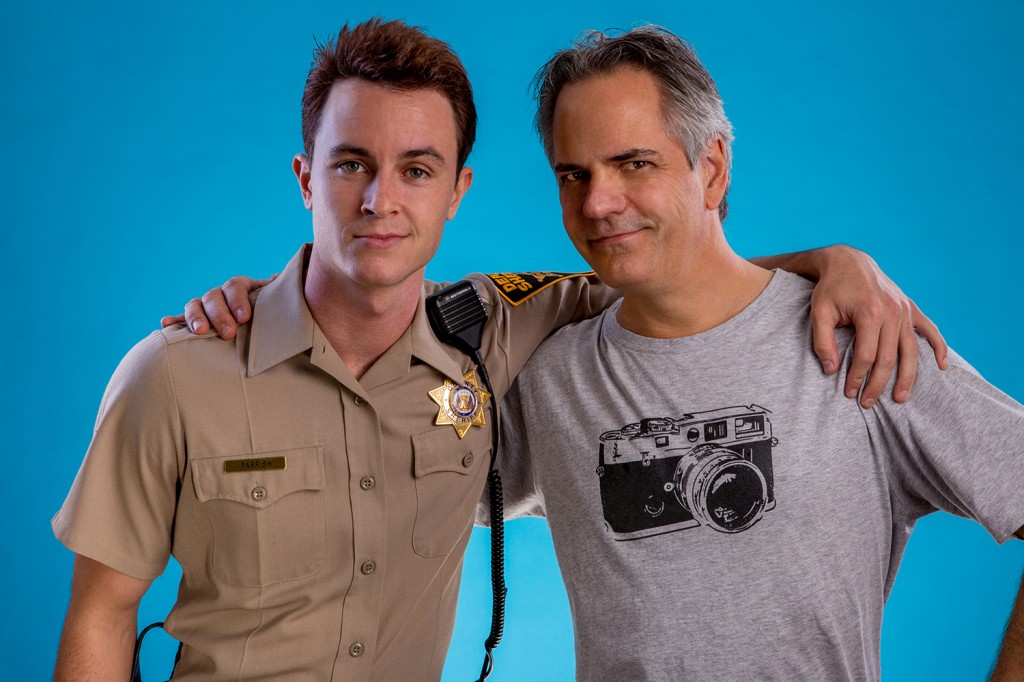
Check out my sweet camera t-shirt designed by Jeffery Saddoris from Faded+Blurred!
Patrick is a professional photographer based in Los Angeles, with a background in music composition, sound design and video production. His work has an emphasis on creative portraits, beauty and fashion as well as product and family photography. For personal work, he loves shooting landscape, macro and experimental photo processes.
All photos © Patrick Shipstad Photography. Bio photos by the talented Nicholas Iverson —except the center shot (that was actually a selfie).
Links:
Patrick Shipstad
Patrick Shipstad’s Instagram
Ryan Kelley’s Instagram
MTV Teen Wolf
Shutterstock
White Lightening
ABR-800
Moon Unit
CreativeLive
Photoshop Compositing: Essential Techniques
Phlearn
Camranger
Sorenson Media
OnOne
Faded + Blurred
