Images used this post are © Patrick Pike, Yosemite destination wedding photographer.
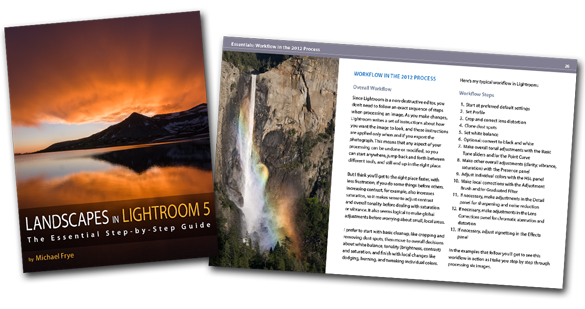
Adobe did some magic with their new 2012 image algorithms. These algorithms shipped with Lightroom 4 and I, personally, find them even more useful in Lightroom 5. In working on learning some of the newer things, I came across this ebook: Landscapes in Lightroom 5. While dedicated to Landscapes, the information is just as useful for wedding photographers, or any other photographer using Lightroom. At $15, it’s kind of a no brainer for me.
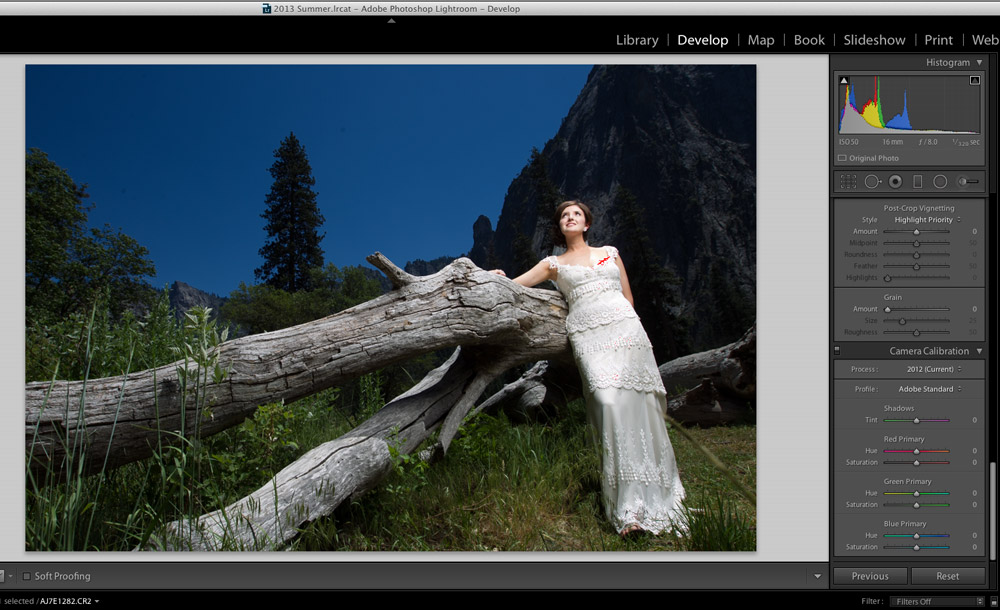
Lightroom 2010 Adobe RAW
Up to 2010, Adobe pretty much just pulled your images in as is. If there were blown highlights, it just left the highlights blown and you had the option of pulling the highlights back in. By blown highlights, using the term loosely, I mean highlights that aren’t showing in the image, but may be salvaged from the RAW data. The image above is shown using the Adobe 2010 RAW algorithm. If you look in the bottom right hand corner of Lightroom, you can see this.
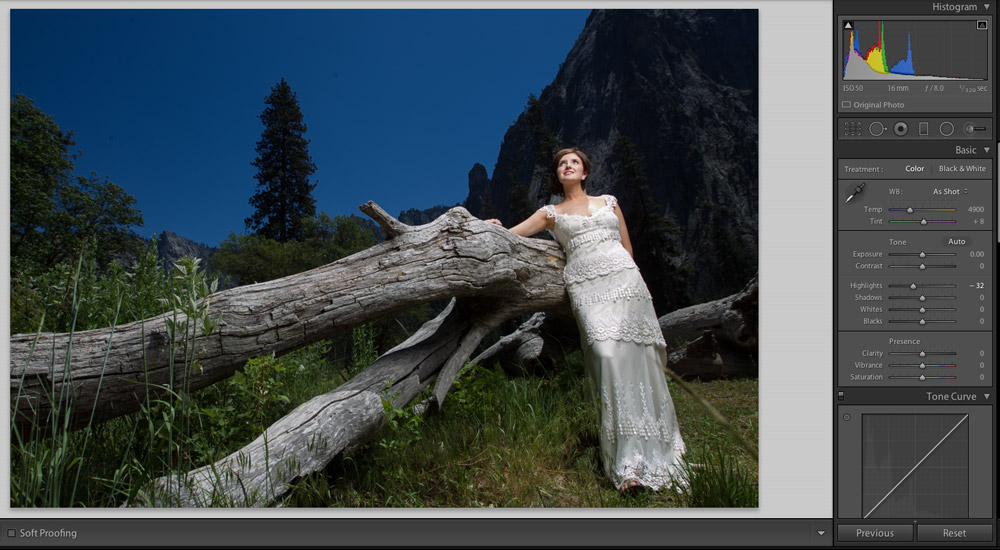
Enter the 2012 Conversion
The good folks at Adobe came to the conclusion, and rightly so in my opinion, that they were just wasting everyone’s time by making us manually bring back the highlights. We all want all the highlights we can get. I don’t know if I’ve ever met a photographer who says, “you know, I wish more of my highlights were blown.” With the new 2012 conversion and even more features in Lightroom 5, Adobe has made Lightroom more adaptive. It automatically adapts the image settings to your image. In this case it auto recovers as many highlights as it can without you doing a darned thing.
Comparing the top image and the image just above, you can see the huge difference in recovered highlights. The bonus? I did nothing. I like doing nothing, it makes my life a lot easier.
If I want to take the extra step and edge the highlights down even more, I can. Notice I’ve moved the highlights down -32. Also note that this is the opposite of what you would do in Lightroom 4. The sliders are backward. Basically in Lightroom 5 all sliders work the same. Moving right makes the image brighter and moving left makes it darker.
Conclusion
In addition to the highlights, they’ve done this for the black point as well. The exposure is also dynamic. So this means you have to do a lot less to your images, as Adobe does a lot of work for you. Also, you’ll see your images in Lightroom 5 look a lot more like the images on the back of your LCD screen.
Thank you Patrick Pike for the image and definitely check out the ebook Landscapes in Lightroom 5.